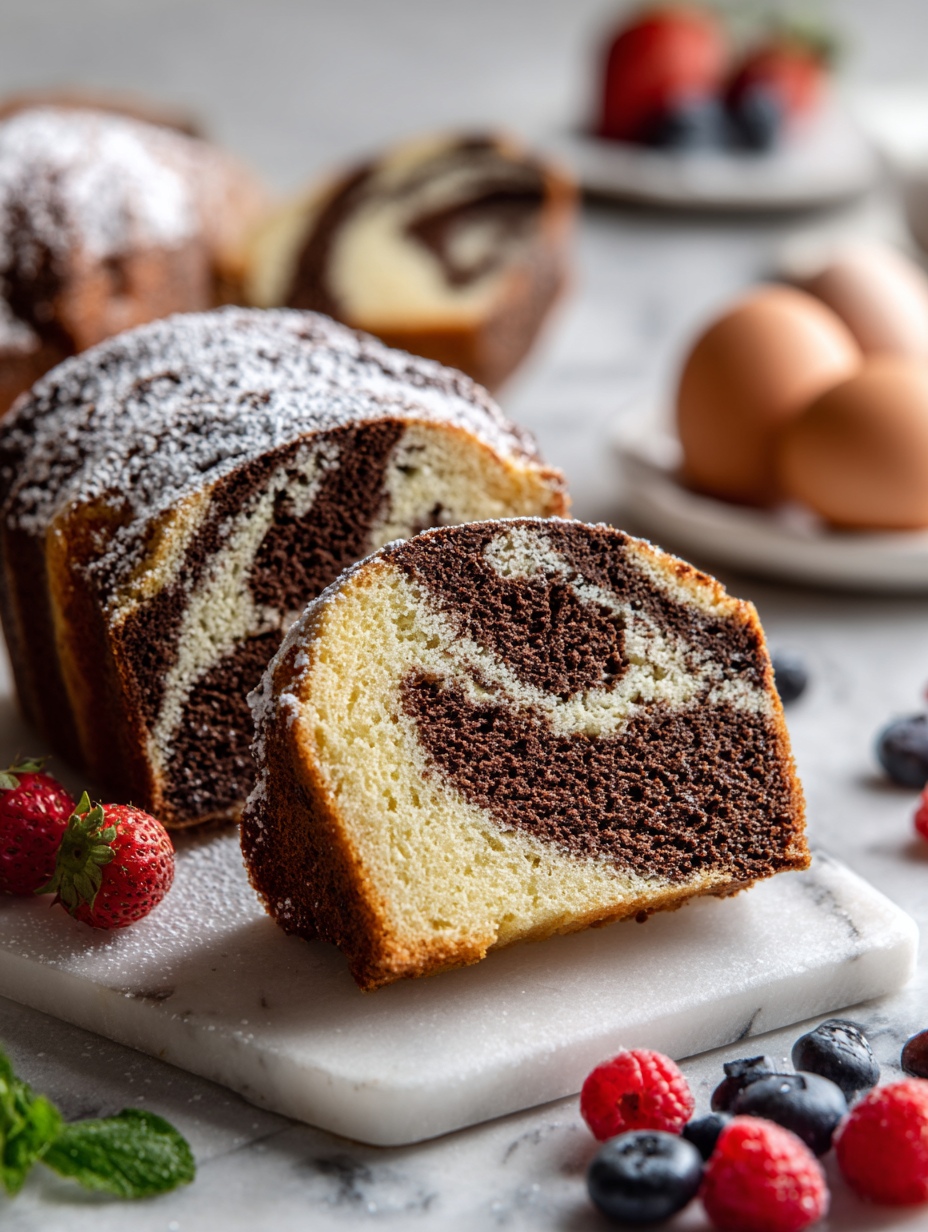
This marble pound cake isn’t just about the flavor, though it’s rich and buttery with a hint of vanilla. It’s about the visual thrill of swirling dark chocolate into pale vanilla batter, creating streaks that look like polished stone. There’s something satisfying about turning simple ingredients into a piece of edible art.
Making a marbled cake feels a bit like a lazy art project—mixing the dark and light batters just enough to get that mesmerizing swirl. It’s a forgiving process, but the payoff is worth it. Every slice reveals a beautiful pattern, a little surprise with each cut, making it perfect for sharing or keeping all to yourself.
This recipe is about the unexpected joy of creating a marbled effect that looks like swirling stone, turning an everyday pound cake into a visual treat. It’s not just about the taste, but about mastering the art of marble, which adds a layer of artistry to baking that often gets overlooked.
Marbling as Edible Art
- Baking this cake always reminds me of my grandmother’s kitchen, the smell of vanilla and cocoa filling the air, nostalgic and comforting.
- There’s a rush of pride when I see the perfect swirl of marble after pouring the batters—like creating a tiny piece of art I get to eat.
- I’ve burned countless batches trying to get the swirl just right, but each mistake taught me patience and precision in the kitchen.
- Sharing slices of this cake at gatherings sparks conversations about family recipes and hidden talents—it’s more than dessert, it’s a connector.
- This recipe is my go-to comfort baking, especially on quiet mornings when the scent alone lifts the spirit, making everything feel a bit brighter.
The inspiration behind this cake
- This recipe came together one rainy afternoon when I was digging through my grandmother’s old recipe box. I found a faded note for a marble pound cake, and suddenly I was transported back to her cozy kitchen, the air thick with vanilla and cocoa. I decided to give it my own twist, but that swirl of dark and light batter still feels like a little edible piece of memory.
- Baking this cake always reminds me of the messes and magic of childhood baking sessions—where patience was scarce but the joy of creating was everything. The way the dark chocolate ribbons streak through the pale batter makes me pause every time, marveling at that swirling artistry. It’s a simple pleasure, but one that feels like a quiet celebration of patience and the beauty of imperfect swirls.
- heading
Marble Cake Trivia and Origins
- The marble effect in cakes dates back to 19th-century European baking, where decorative techniques were highly prized among pastry chefs.
- Originally, marble pound cakes were a way to showcase the baker’s skill in creating intricate swirl patterns, often in royal or wealthy households.
- The term ‘marble’ in baking reflects the visual resemblance to natural stone, a nod to the aesthetic appeal that elevates humble pound cake into edible art.
Ingredient breakdown
- Unsalted butter: I use real butter for richness and a tender crumb—skip the margarine, it just won’t have that deep, nutty aroma.
- Sugar: Granulated sugar gives a fine, sweet crust and moist crumb—try brown sugar for a caramel note, but expect a darker color.
- Eggs: Large eggs are my go-to; they bind everything together and add moisture—if yours are tiny, add an extra half egg.
- Vanilla extract: A splash of pure vanilla brightens the batter with floral warmth—substitute with vanilla bean paste for a richer aroma.
- Chocolate: I prefer dark, bittersweet chocolate for the swirl—melt it gently until smooth, and use a little more if you love a bold contrast.
- Flour: All-purpose flour is reliable; for a lighter crumb, sift it well or swap half with cake flour, but that can make the texture more delicate.
- Cocoa powder: Unsweetened cocoa gives that deep, smoky flavor—sift it with the flour to avoid lumps and intensify the chocolate punch.
Spotlight on key ingredients
Unsalted butter:
- I use real butter for richness and a tender crumb—skip the margarine, it just won’t have that deep, nutty aroma.
- Sugar: Granulated sugar gives a fine, sweet crust and moist crumb—try brown sugar for a caramel note, but expect a darker color.
- Eggs: Large eggs are my go-to; they bind everything together and add moisture—if yours are tiny, add an extra half egg.
Chocolate:
- I prefer dark, bittersweet chocolate for the swirl—melt it gently until smooth, and use a little more if you love a bold contrast.
- Cocoa powder: Unsweetened cocoa gives that deep, smoky flavor—sift it with the flour to avoid lumps and intensify the chocolate punch.
Notes for ingredient swaps
- Dairy-Free: Swap butter for coconut oil or vegan butter—won’t have that rich, creamy melt but still moist.
- Sugar: Use honey or maple syrup instead—adds moisture and a subtle floral or caramel note, but expect slight sweetness change.
- Eggs: Substitute with applesauce or flaxseed meal mixed with water—binds well, though texture may be a bit denser.
- Chocolate: Replace dark chocolate with white or milk chocolate—will alter the swirl’s richness and color, but still tasty.
- Flour: Use gluten-free all-purpose flour—may slightly change crumb texture, but it adapts well with a bit more mixing.
- Cocoa Powder: Swap with carob powder—less intense, sweeter, and a different depth of flavor, but still chocolate-like.
- Vanilla: Use vanilla bean paste for a richer, more aromatic punch—if unavailable, almond extract can add a different flavor twist.
Equipment & Tools
- Oven: Bake the cake evenly at a steady temperature.
- Loaf pan: Shape and contain the batter during baking.
- Mixer (hand or stand): Cream butter and sugar, and blend eggs smoothly.
- Spatula: Fold dry ingredients and create marbled swirl.
- Toothpick or skewer: Test doneness and create swirls.
- Cooling rack: Cool the cake evenly to prevent sogginess.
Step-by-step guide to marble pound cake
- Preheat your oven to 175°C (350°F). Grease a 9×5 inch loaf pan with butter and dust lightly with flour, tapping out excess.
- In a large bowl, cream 1 cup (225g) of unsalted butter and 1 1/2 cups (300g) sugar until pale and fluffy, about 3-4 minutes. Use a hand or stand mixer on medium speed.
- Add 4 large eggs one at a time, beating well after each addition. Make sure each egg is fully incorporated before adding the next.
- Stir in 1 tablespoon vanilla extract. Mix until just combined. The batter should be smooth and creamy, with no lumps.
- In a separate bowl, sift together 2 cups (240g) all-purpose flour, 1/2 cup (45g) cocoa powder, and 1 teaspoon baking powder.
- Gradually add the dry ingredients to the wet, mixing on low speed or folding gently with a spatula until just combined. Do not overmix.
- Divide the batter evenly into two bowls. In one bowl, fold in 1/2 cup (90g) melted dark chocolate or cocoa-rich chocolate chips.
- Drop spoonfuls of plain batter into the prepared pan, then add dollops of chocolate batter on top. Repeat until all batter is used.
- Using a skewer or knife, swirl the two batters together in a figure-eight pattern to create marbled effects. Don’t overmix—keep some streaks visible.
- Bake in the oven for 55-65 minutes. Check doneness after 55 minutes by inserting a toothpick into the center; it should come out with moist crumbs but no wet batter.
- If the top browns too quickly before the cake is done, tent loosely with foil. If the toothpick comes out sticky, bake for a few more minutes.
- Once baked, turn off the oven and let the cake sit inside for 10 minutes. Then, transfer to a wire rack and cool completely before removing from pan.
- Rest the cake for at least 30 minutes to allow the crumb to set and flavors to meld. Slice with a serrated knife for clean edges.
- Serve slices slightly warm or at room temperature, revealing the intricate swirl of marble inside.
Cool the cake completely on a wire rack before slicing. Resting allows the crumb to firm up, making slices cleaner. Serve at room temperature, or gently warm slices for a cozy treat.
How to Know It’s Done
- Cake is golden brown and pulls slightly away from the sides of the pan.
- Toothpick inserted into the center comes out with moist crumbs, not wet batter.
- The top feels firm and springs back when lightly pressed.
Marble Pound Cake
Ingredients
Equipment
Method
- Preheat your oven to 175°C (350°F). Grease a 9x5 inch loaf pan with butter and dust lightly with flour, tapping out the excess.
- Using a mixer, cream the softened butter and sugar together on medium speed until the mixture is pale, fluffy, and fragrant, about 3-4 minutes. You’ll notice it turns a lighter color and feels smooth.
- Add the eggs one at a time, beating well after each addition. The batter should become silky and increase in volume with each egg. Scrape down the sides of the bowl as needed.
- Stir in the vanilla extract, mixing just until combined. The aroma of vanilla will fill your kitchen, and the batter will look smooth and glossy.
- In a separate bowl, sift together the flour, cocoa powder, and baking powder. Whisk lightly to combine.
- Add the dry mixture gradually to the wet batter, mixing on low speed or folding gently with a spatula until just combined. Be careful not to overmix—this keeps the cake tender.
- Divide the batter evenly into two bowls. Mix the melted dark chocolate into one bowl, stirring until smooth and glossy.
- Drop spoonfuls of plain batter into the prepared loaf pan, then add spoonfuls of chocolate batter on top. Continue until all batter is used, creating a layered effect.
- Using a toothpick or skewer, gently swirl through the batter in a figure-eight pattern. Avoid overmixing—aim for a marbled look with distinct streaks of dark and pale batter.
- Bake in the preheated oven for 55-65 minutes. Check doneness by inserting a toothpick into the center; it should come out with moist crumbs, not wet batter.
- Let the cake cool in the pan for 10 minutes, then transfer to a wire rack and cool completely before slicing. This resting period helps the crumb set and makes slicing easier.
- Slice and serve the beautiful marbled cake at room temperature, revealing the intricate swirl pattern inside. Enjoy the moist, tender crumb and rich chocolate flavor with every bite.
Pro tips for marble pound cake
- Bolded: Use room temperature butter for a smoother, creamier batter that incorporates more easily.
- Bolded: Gently fold in dry ingredients to avoid knocking out too much air, keeping the cake light.
- Bolded: Drop spoonfuls of batter and swirl with a skewer—avoid overmixing to keep beautiful marble streaks.
- Bolded: Check for doneness by inserting a toothpick—moist crumbs mean it’s just right, no wet batter.
- Bolded: Cool the cake completely on a wire rack before slicing—this prevents crumbling and preserves the swirl pattern.
Common marble cake mistakes and fixes
- OVER-MIXED BATTER: Causes dense texture—fold gently to keep it tender.
- UNDERSALTED: Results in flat flavor—add a pinch more salt if batter tastes bland.
- BAKING AT WRONG TEMP: Too hot or cold affects rise—use oven thermometer for accuracy.
- NOT COOLING ENOUGH: Soggy cake—let it cool completely on a rack to set the crumb.
Quick Fixes & Pantry Swaps
- If batter is too thick, splash in a teaspoon of milk and fold gently.
- When swirl isn’t visible, patch with a toothpick and swirl more thoroughly.
- Splash a few drops of vanilla or coffee to enhance flavor and shimmer.
- Dumped the swirl? Rescue with a skewer and re-swirl before baking.
- When chocolate streaks fade during baking, opt for a higher cocoa content or chill batter slightly for sharper contrast.
Prep, store, and reheat tips
- Prep the batter up to 24 hours in advance; keep it covered in the fridge to preserve freshness and prevent drying out.
- Wrap cooled cake tightly with plastic wrap or store in an airtight container; it stays moist and flavorful for up to 3 days at room temperature.
- For longer storage, freeze slices or whole cake for up to 1 month; wrap well to prevent freezer burn and flavor transfer.
- Reheat slices gently in a low oven (about 150°C/300°F) for 10-15 minutes, or microwave in short bursts until just warm. The aroma of vanilla and chocolate will re-emerge, and the texture stays tender.
Top questions about marble pound cake
1. Can I use cold butter?
Use room temperature butter to ensure a smooth, creamy batter that traps air for a lighter cake.
2. Can I substitute margarine for butter?
Yes, but soften it first. Cold butter won’t cream well and can cause lumps in your batter.
3. Should I use chopped chocolate or chips?
Chocolate chips melt slightly during baking, creating rich streaks, but melted chocolate gives a more dramatic swirl.
4. How do I know when it’s baked properly?
Bake until a toothpick inserted near the center comes out with moist crumbs, not wet batter.
5. How do I keep the swirl distinct?
Swirl gently with a skewer or knife—overmixing can blend the layers, losing the marble effect.
6. How should I store the cake?
Wrap cooled cake tightly in plastic wrap or store in an airtight container to keep it moist for days.
7. How do I reheat leftovers without drying them out?
Reheat slices in a 150°C (300°F) oven for about 10 minutes for best flavor and texture.
8. What if my batter is too thick or thin?
If the batter is too thick, add a splash of milk; if too runny, add a bit more flour.
9. How do I get a nice marble effect?
Use a skewer or toothpick to create a swirl pattern, but don’t overmix — keep some streaks visible.
10. Can I make the chocolate swirl more intense?
For a more intense chocolate flavor, melt the chocolate slightly and fold it into half the batter before swirling.
This marble pound cake isn’t just a pretty slice — it’s a reminder that simple ingredients, when treated with patience, can become something unexpectedly beautiful. Each swirl of dark and light batter feels like a tiny act of rebellion against the ordinary, a little edible art that makes every day feel special.
Sharing this cake feels like passing along a quiet secret, a moment of craftsmanship wrapped in comfort. It’s a piece of my kitchen story, one that I keep returning to, especially when I want a touch of nostalgia with a side of chocolate and vanilla.

Hey there, I’m Devon Harper. I run a small neighborhood café by day, cook most of my meals far too late at night, and write Midnight Grocery Runs somewhere in between. If you’ve ever wondered whether something simple could turn into something comforting after a long day, you’ll feel right at home here.


