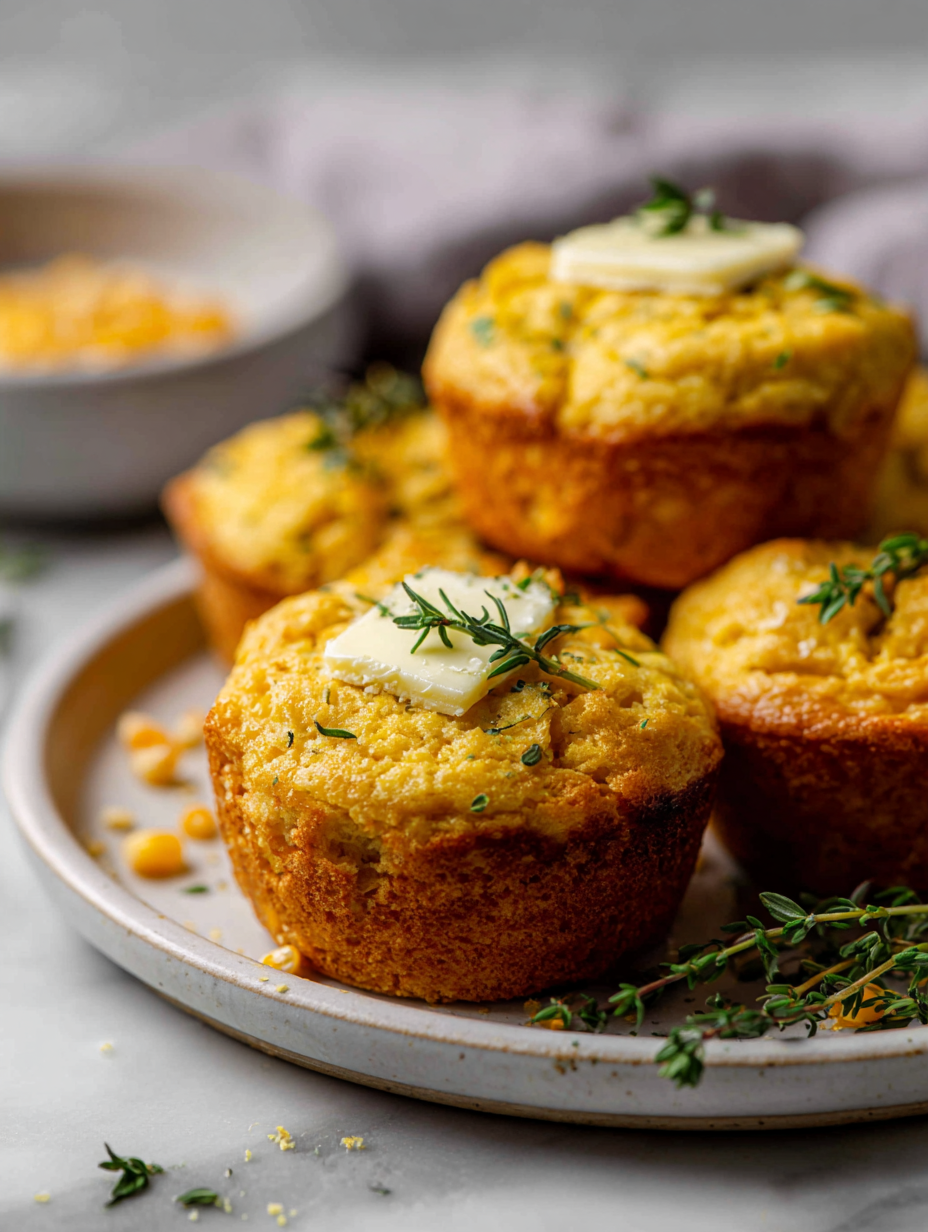
Making homemade corn muffins is less about perfection and more about capturing that warm, chaotic joy of early mornings with family. The smell of fresh batter bubbling in the oven, the way the edges turn golden and slightly crispy—these are small, imperfect moments that connect us to simpler times.
This recipe is born from those mornings where I want something comforting, easy to throw together, and deeply satisfying. It’s a ritual that invites a little bit of chaos but rewards you with a batch of tender, sweet, and slightly smoky muffins that feel like a warm hug from the kitchen.
Baking from scratch reminds me that good things don’t have to be complicated. Sometimes, the best memories are kneaded into the batter, and the smell alone can turn any hectic day into a slow, quiet moment of joy.
Focusing on how homemade corn muffins can be a comforting, nostalgic ritual that reconnects us to simpler, slower mornings and family gatherings, emphasizing the personal joy and chaos of baking from scratch.
A Cozy Morning Ritual
- Baking these muffins always reminds me of lazy Sunday mornings in grandma’s kitchen, the air thick with butter and cornmeal.
- There’s a wild, chaotic joy in watching the batter puff up and crackle in the oven, like a small celebration.
- These muffins have become my go-to for last-minute brunches—simple, forgiving, and totally comforting.
- Every time I make them, I feel a flicker of pride—like I’m holding onto a secret family recipe, even if I’m just winging it.
- They’re more than just bread; they’re a tiny, sweet rebellion against the rush of the day.
The story behind this recipe
- Making these corn muffins takes me back to a summer I spent hiking through the Midwest, where roadside stands sold the most fragrant, sweet corn. I remember the smell of fresh corn husks and the sticky fingers from shucking corn in the early morning light. That memory fuels my love for this humble, yet deeply nostalgic recipe.
- I’ve always found that the best recipes come from a bit of chaos in the kitchen—lost eggs, accidental splashes of honey, or a dash of this and that. These muffins are no different; they’re forgiving and cozy, like a secret handshake from a slower, simpler time.
- heading: A Slice of Nostalgia
Corn Muffins’ Rich History
- Corn muffins have roots in Native American cuisine, where corn was a staple and ground into meal for centuries.
- Early settlers adapted indigenous recipes, blending cornmeal with European baking techniques, shaping what we now call classic Southern cornbread.
- In the Deep South, corn muffins became a symbol of hearty, rustic comfort—easily baked with simple pantry ingredients and loved across generations.
- During times of scarcity, cornmeal was a resilient staple, making these muffins a humble yet essential part of many families’ tables.
- Today, these muffins are a nostalgic throwback, a reminder of slow mornings and shared family breakfasts, wrapped in a crumbly, slightly sweet bite.
Key Ingredients Breakdown
- Cornmeal: I love the gritty, slightly sweet punch of good cornmeal—look for stone-ground if you can. If you want a smoother texture, try fine-milled, but don’t skip that rich corn flavor.
- All-purpose flour: It gives structure without overpowering the corn. If you’re gluten-free, swap with a mild gluten-free blend—just note it might be a touch denser.
- Buttermilk: Its tang keeps the muffins lively and tender—if you don’t have buttermilk, mix milk with a splash of vinegar or lemon juice; it’ll still brighten the batter.
- Sugar: A touch of sweetness balances the corn’s earthiness—brown sugar adds a caramel note, but regular granulated works fine if that’s what you have.
- Eggs: Bind everything together and give a little lift—if you’re out, a flaxseed or chia seed egg (1 tbsp ground flax + 3 tbsp water) can do the trick.
- Butter: I prefer melted butter for that toasty, nutty undertone—if you’re dairy-free, use a neutral oil, but expect a slightly different richness and aroma.
- Optional add-ins: Cheddar, jalapeños, or scallions—these can turn your muffins into a little savory surprise, just fold them in gently before baking.
Spotlight on key ingredients
Cornmeal:
- I love the gritty, slightly sweet punch of good cornmeal—look for stone-ground if you can. If you want a smoother texture, try fine-milled, but don’t skip that rich corn flavor.
- All-purpose flour: It gives structure without overpowering the corn. If you’re gluten-free, swap with a mild gluten-free blend—just note it might be a touch denser.
Buttermilk:
- Its tang keeps the muffins lively and tender—if you don’t have buttermilk, mix milk with a splash of vinegar or lemon juice; it’ll still brighten the batter.
- Sugar: A touch of sweetness balances the corn’s earthiness—brown sugar adds a caramel note, but regular granulated works fine if that’s what you have.
Notes for ingredient swaps
- Dairy-Free: Swap buttermilk for almond or soy milk mixed with 1 tbsp lemon juice—won’t be as tangy but still moist.
- Gluten-Free: Use a 1:1 gluten-free baking blend for all-purpose flour—expect a slightly denser crumb.
- Sweetener: Honey or maple syrup can replace sugar—add a touch less liquid if using liquid sweeteners.
- Butter: Coconut oil or neutral vegetable oil work well—expect a subtler flavor, but keep that moist crumb.
- Cornmeal: For a finer texture, try finely ground cornmeal or polenta—still delivers that sweet, earthy corn aroma.
- Eggs: Flaxseed or chia seed eggs (1 tbsp ground flax + 3 tbsp water) for vegan options—may slightly alter rise and texture.
- Add-ins: Cheddar, jalapeños, or scallions—fold them in before baking for a savory kick or skip for classic sweetness.
Equipment & Tools
- Measuring cups and spoons: To measure ingredients accurately and maintain consistency.
- Mixing bowls: To combine dry and wet ingredients separately.
- Whisk: To blend wet ingredients thoroughly.
- Spatula: To fold ingredients gently without deflating the batter.
- Muffin tin: To shape the muffins and ensure even baking.
- Oven: To bake the muffins at a steady, controlled temperature.
- Cooling rack: To cool the muffins evenly and keep the bottoms crispy.
Step-by-step guide to Corn Muffins
- Gather all your ingredients: 1 cup cornmeal, 1/2 cup all-purpose flour, 1/4 cup sugar, 1 tbsp baking powder, 1/2 tsp salt, 1 cup buttermilk, 2 large eggs, 1/4 cup melted butter. Preheat your oven to 200°C (390°F). Grease a 12-cup muffin tin or line with paper liners. Have a mixing bowl, whisk, spatula, and measuring cups ready.
- In a large bowl, whisk together the dry ingredients: cornmeal, flour, sugar, baking powder, and salt. This ensures even distribution and prevents clumps. Smell that earthy, slightly toasted aroma as you mix—the foundation of good muffins.
- In a separate bowl, beat the eggs until frothy. Pour in the buttermilk and melted butter, whisk until combined. The mixture should smell bright and tangy, with a slight buttery richness. If it smells off or sour beyond the tang, double-check your ingredients.
- Pour the wet mixture into the dry ingredients. Gently fold with a spatula until just combined—do not overmix. The batter should be lumpy but moist. If you see streaks of flour, fold a little more. Overmixing causes dense muffins, so keep it gentle.
- Spoon the batter into the prepared muffin tin, filling each cup about 3/4 full. You’ll hear a faint crackle as the batter hits the hot tin. Place in the oven and bake for 15-20 minutes. The muffins should turn golden and a toothpick inserted in the center comes out clean.
- Check for doneness: the tops should be golden brown, and the edges slightly crispy. The muffins will have a slight bounce when gently pressed. If they crack excessively or smell burnt, reduce heat slightly or check your oven temperature.
- Remove from oven and let cool slightly in the tin for 5 minutes. Transfer to a wire rack to cool completely, about 10 minutes. Resting lets the crumb set and makes them easier to handle, preserving that tender crumb and crisp edges.
- Serve warm or at room temperature. These muffins are best eaten within a day or two, but can be stored in an airtight container for up to 3 days. Reheat in the microwave for 10-15 seconds until warm, listening for that soft crackle of fresh-baked goodness.
Let the muffins rest in the tin for 5 minutes before transferring to a wire rack. Serve warm or at room temperature. For best texture, consume within 2-3 days, reheating briefly if needed.
How to Know It’s Done
- A golden-brown top with crispy edges indicates doneness.
- A toothpick inserted in the center comes out clean, with moist crumbs.
- Muffins feel firm but spring back when gently pressed.
Homemade Corn Muffins
Ingredients
Equipment
Method
- Preheat your oven to 200°C (390°F) and grease a 12-cup muffin tin or line it with paper liners. Gather all your ingredients and tools for easy assembly.
- In a large mixing bowl, whisk together the cornmeal, flour, sugar, baking powder, and salt until evenly combined. Smell the toasted, earthy aroma of the dry ingredients as you mix—this forms the flavorful base of your muffins.
- In a separate bowl, beat the eggs until frothy and light, then pour in the buttermilk and melted butter. Whisk until everything is well blended and the mixture smells tangy with a buttery undertone.
- Pour the wet mixture into the dry ingredients and gently fold using a spatula until just combined. Do not overmix—leave some lumps for a tender crumb. You should see a thick, slightly lumpy batter that feels moist to the touch.
- Spoon the batter evenly into the prepared muffin tin, filling each cup about three-quarters full. The batter should mound slightly over the edges, and you'll hear a soft crackle as it settles into the tin.
- Bake in the preheated oven for 15-20 minutes, or until the tops are golden brown and a toothpick inserted into the center comes out clean. During baking, the muffins will puff up and develop a crackly, crispy crust.
- Remove the muffins from the oven and let them cool in the tin for about 5 minutes. Then, transfer them to a cooling rack to cool completely for 10 minutes. The smell of warm, toasted corn and butter will fill the air, inviting you to taste.
- Serve the muffins warm or at room temperature, enjoying their tender, crumbly texture with crispy edges. For best flavor, consume within a couple of days or reheat briefly in the microwave. These muffins are perfect for a cozy breakfast or snack that feels like a warm hug from the kitchen.
Tips & Tricks for Perfect Corn Muffins
- Use freshly ground cornmeal for a robust, earthy aroma that wakes up the senses.
- Gently fold wet and dry ingredients to keep the batter tender and airy—avoid overmixing.
- For a crispy top, bake at a slightly higher temperature for the first 5 minutes, then lower.
- Add a splash of maple syrup or honey to the batter for a subtle caramel note that enhances sweetness.
- Check muffins around 15 minutes—look for a golden hue and a crackly top that’s just set.
- Rest muffins for 5 minutes before removing from the tin—this helps set the crumb and prevents sticking.
- Brush with melted butter immediately after baking for an extra touch of richness and shine.
Common mistakes and how to fix them
- FORGOT to preheat oven → Always preheat before mixing.
- DUMPED too much batter → Fill cups 3/4 full for even rise.
- OVER-TORCHED edges → Reduce oven temperature or check calibration.
- MISSED mixing dry ingredients → Whisk thoroughly for even texture.
Quick fixes and pantry swaps
- If batter is too thick, splash in a little more buttermilk to loosen it.
- When muffins crack excessively, reduce oven temperature or cover edges with foil.
- Splash some water on muffins if they seem dry after baking—steams them slightly.
- Patch a sunken muffin by briefly broiling it—watch closely for color and crackle.
- Shield muffins with foil if tops brown too fast—prevent burnt edges while inside finishes.
Prep, store, and reheat tips
- Prep the dry ingredients—measure and mix the cornmeal, flour, sugar, baking powder, and salt the day before. Store in an airtight container; the dry mix stays fresh for up to a week and makes mornings easier.
- Mix the wet ingredients (buttermilk, eggs, melted butter) ahead and keep refrigerated for up to 24 hours. Give it a quick whisk before combining with the dry for a fresh batter aroma.
- Baked muffins can be stored in an airtight container at room temperature for 1-2 days, or in the fridge for up to 4 days. The flavor stays bright, but they do lose some of that just-baked tenderness.
- Reheat muffins in the microwave for 10-15 seconds until warm and listen for that soft crackle of fresh muffins. For a crispier edge, reheat in a 180°C (350°F) oven for 5 minutes, watching for that golden shine.
- To freeze, wrap cooled muffins tightly in plastic wrap and store in a freezer bag for up to 3 months. Thaw at room temperature and reheat briefly for that just-baked aroma and moist texture.
Top questions about Corn Muffins
1. How do I know if my cornmeal is fresh?
Use fresh or properly stored cornmeal for the best flavor. Old or stale cornmeal can make muffins dry and flavorless.
2. Can I make these gluten-free?
Yes, you can substitute with gluten-free flour blends, but the texture might be denser. Adjust baking time if needed.
3. What can I use instead of buttermilk?
If you don’t have buttermilk, mix 1 cup milk with 1 tablespoon vinegar or lemon juice. Let sit for 5 minutes before using.
4. How do I know when the muffins are done?
Bake until the tops are golden and a toothpick inserted in the center comes out clean. Muffins should feel firm but springy.
5. Can I add sugar substitutes?
For a sweeter muffin, add a little honey or maple syrup to the batter. Reduce liquid slightly if the batter becomes too runny.
6. How should I store leftover muffins?
Store cooled muffins in an airtight container at room temperature for 1-2 days, or refrigerate up to 4 days. Reheat briefly for best texture.
7. Can I freeze my corn muffins?
Yes, you can freeze baked muffins. Wrap tightly and freeze for up to 3 months. Thaw at room temp and reheat if desired.
8. What if my muffins crack or burn?
If the muffins crack excessively, reduce oven temperature slightly or cover with foil. If they seem underdone, bake a few minutes longer.
9. How do I avoid dense muffins?
Gently fold ingredients to keep muffins tender. Overmixing leads to dense muffins with tunnels and less rise.
10. Which type of cornmeal is best?
Use freshly ground cornmeal for maximum aroma. For a smoother crumb, try fine-milled cornmeal, but don’t skip the corn flavor.
Baking these corn muffins is more than just a kitchen task; it’s a small act of comfort that reconnects me to simpler times and slower mornings. The smell of buttery, sweet corn filling the air can turn any hectic day into a quiet pause, a moment to breathe.
These muffins remind me that good, honest food doesn’t need fuss or fancy ingredients—just patience and a little chaos in the best way. Every batch feels like a tiny celebration of home, a taste of nostalgia wrapped in a crispy, tender crumb.

Hey there, I’m Devon Harper. I run a small neighborhood café by day, cook most of my meals far too late at night, and write Midnight Grocery Runs somewhere in between. If you’ve ever wondered whether something simple could turn into something comforting after a long day, you’ll feel right at home here.


