This peanut butter muffin recipe takes me straight back to childhood, sneaking bites of my mom’s crunchy peanut butter sandwiches before dinner. It’s funny how those simple flavors stick with you, especially when you turn them into something warm and easy to grab on busy mornings. These muffins are like a little nostalgic hug—sweet, salty, and just a bit messy.
What I love about these muffins is how forgiving they are. No fancy equipment or hard-to-find ingredients, just good ol’ peanut butter and pantry staples. They’re perfect for when you want a quick treat that feels homemade but doesn’t demand hours in the kitchen. Plus, the smell when they’re baking—oh, it’s the kind that makes you forget all your worries for a bit.
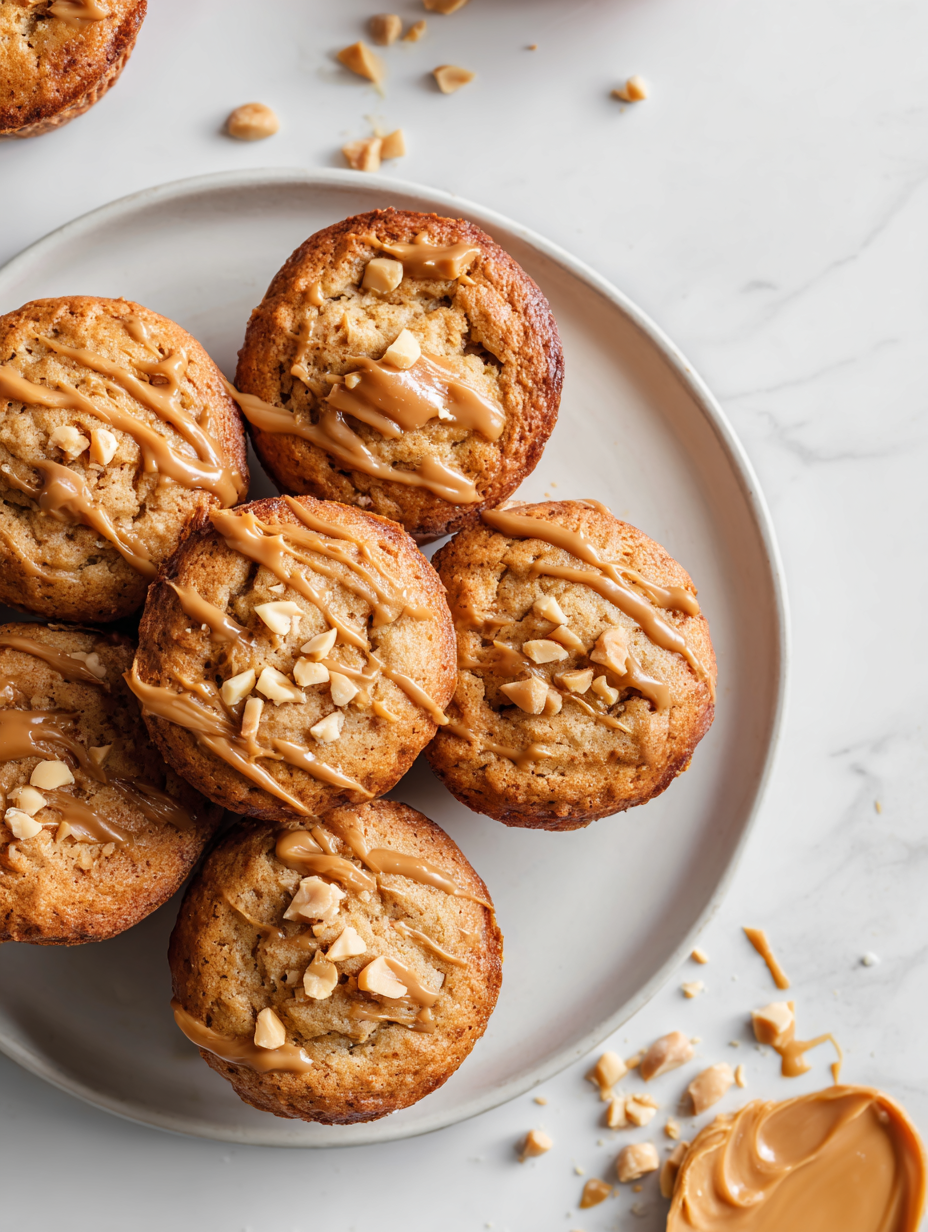
This recipe is inspired by childhood memories of sneaking peanut butter sandwiches before dinner, but transformed into a comforting muffin that’s perfect for busy mornings or a quick snack, blending nostalgia with practicality.
Nostalgic bites with a twist
- Baking these muffins takes me back to my grandma’s kitchen, where the smell of peanut butter and warm oven would fill the air, wrapping me in a quiet sort of happiness.
- I love how these muffins turn out slightly rustic—cracked tops with a hint of saltiness that makes every bite feel like a small, satisfying rebellion.
- There’s a messy joy in squeezing that extra dollop of peanut butter on top before baking—it’s my little cheat to amp up the flavor and make each muffin feel special.
Inspiration Behind the Muffins
This recipe came about when I was rummaging through my pantry, craving something that combined childhood comfort with a bit of kitchen improvisation. I’ve always loved the idea of turning simple ingredients into something warm and satisfying, especially when those ingredients have a nostalgic glow. The peanut butter muffin felt like a natural way to bring that cozy, messy feeling into a quick bake that’s perfect for mornings or late-night cravings.
Trivia and Historical Notes
- These muffins draw inspiration from childhood peanut butter sandwiches, turning a simple snack into a baked treat.
- Peanut butter baking dates back decades, often made during wartime when ingredients were limited but comfort was needed.
- The combination of peanut butter and baked goods is a nostalgic nod to Southern comfort foods, where peanut butter is a staple.
Key Ingredients Breakdown
- Peanut Butter: I prefer creamy for smooth muffins, but crunchy adds delightful texture—try both to see what sticks.
- All-Purpose Flour: I keep it simple, but whole wheat gives a nuttier flavor and denser crumb—experiment if you like a heartier muffin.
- Baking Powder: It’s the secret to that lift—don’t skip it, or your muffins will be flat and sad—bake at 180°C/350°F for a good rise.
- Eggs: They bind everything together and add richness—use large eggs for consistency, or flax eggs if you’re vegan and want a nutty hint.
- Honey or Maple Syrup: I love the natural sweetness they bring, but if you want less sugar, cut back slightly or replace with mashed banana for moistness.
- Milk: I reach for whole milk for a creamy crumb, but almond or oat milk keeps it dairy-free—just watch for a slightly different moisture level.
- Sugar: Regular granulated is fine, but brown sugar adds a caramel note—adjust to your sweetness preference for that cozy, toasted aroma.
Spotlight on key ingredients
Peanut Butter:
- I love creamy for a smooth, melt-in-your-mouth texture, but crunchy adds unexpected crunch—try both and see which you prefer.
- It behaves a bit oozy when mixed, giving the muffins a moist crumb; during baking, it turns fragrant and slightly toasted—an unmistakable nutty aroma that fills your kitchen.
All-Purpose Flour:
- I stick with basic for a light, tender crumb, but swapping in whole wheat adds a nuttier flavor and denser texture—good for a heartier bite.
- It absorbs moisture and helps the muffins rise—watch for overmixing, which can make the crumb tough, but a gentle fold keeps things tender and airy.
Notes for ingredient swaps
- Dairy-Free: Swap regular milk for almond or oat milk—your muffins stay moist, though the richness might be a tad lighter.
- Nut Allergies: Use sunflower seed butter instead of peanut butter—maintains the nutty flavor with a slightly earthier note.
- Gluten-Free: Replace all-purpose flour with a 1:1 gluten-free blend—watch for texture differences, but they still rise well.
- Sugar Variations: Maple syrup or agave can replace honey or sugar, adding a subtle caramel or floral note—reduce liquid slightly to compensate.
- Vegan Version: Use flax eggs (1 tbsp ground flaxseed + 3 tbsp water) instead of eggs—adds a mild nutty flavor and keeps them binding.
- Sweetener: Coconut sugar or brown sugar can be used for a deeper caramel flavor—though they might make the muffins darker.
- Extra Moisture: Mashed banana or applesauce works in a pinch—adds moisture and a hint of fruity sweetness, but could alter the crumb.
Equipment & Tools
- Muffin tin: Holds the batter and shapes the muffins.
- Mixing bowls: Combine wet and dry ingredients separately.
- Whisk or spoon: Mix ingredients thoroughly and gently fold in dry ingredients.
- Measuring cups and spoons: Ensure accurate ingredient quantities.
- Cooling rack: Allow muffins to cool evenly and prevent sogginess.
Step-by-step guide to peanut butter muffins
- Preheat your oven to 180°C (350°F). Grease a muffin tin or line with paper liners. Set aside.
- In a large mixing bowl, combine 1 cup (240g) of creamy peanut butter, ½ cup (100g) sugar, and 1 large egg. Mix until smooth and slightly fluffy, about 2 minutes with a whisk or spoon.
- Stir in ½ cup (120ml) of milk and 1 teaspoon of vanilla extract. Mix until well incorporated. The batter should be thick but pourable. Adjust with a splash more milk if it’s too stiff.
- In a separate bowl, whisk together 1 ½ cups (190g) of all-purpose flour, 1 teaspoon of baking powder, and a pinch of salt. Sift or whisk to combine.
- Gradually add the dry ingredients to the wet mixture. Fold gently just until combined—avoid overmixing, or muffins get tough. The batter will be lumpy but uniform.
- Spoon the batter into the prepared muffin tin, filling each cup about ¾ full. If you like, add a small dollop of peanut butter on top of each muffin for extra gooeyness.
- Bake for 20-25 minutes. The tops should be golden and slightly cracked. Your kitchen will fill with that warm, peanutty aroma. Check with a toothpick—if it comes out clean, they’re ready.
- Remove from oven and let the muffins rest in the tin for 5 minutes. Then transfer to a wire rack to cool slightly. Muffins are best warm but still good at room temp.
- Finish with a light drizzle of honey or a sprinkle of coarse sea salt if desired. Serve with a glass of cold milk or a dollop of yogurt for extra richness.
- Enjoy these muffins while still slightly warm—the centers stay moist and fragrant, perfect for a hurried breakfast or a cozy snack.
Let the muffins rest for 5 minutes in the tin, then transfer to a wire rack. Finish with a drizzle of honey or a sprinkle of sea salt if desired. Serve warm or at room temperature, pairing with your favorite cold beverage.
How to Know It’s Done
- Golden, cracked tops and a fragrant peanut aroma.
- Toothpick inserted in the center comes out clean or with moist crumbs.
- Muffins feel firm but springy when gently pressed, not overly soft or dense.
Peanut Butter Muffins
Ingredients
Equipment
Method
- Preheat your oven to 180°C (350°F). Grease your muffin tin or line it with paper liners and set aside.
- In a large bowl, mix the creamy peanut butter and sugar together until smooth and slightly fluffy—this creates a fragrant, nutty base.
- Add the large egg to the peanut butter mixture and whisk until well combined, feeling smooth and slightly frothy.
- Pour in the milk and vanilla extract, stirring gently until everything is evenly incorporated. The batter should be thick but pourable.
- In a separate bowl, whisk together the flour, baking powder, and salt to evenly distribute the leavening agents.
- Gradually add the dry ingredients into the wet mixture, folding gently with a spatula or spoon just until combined—be careful not to overmix to keep the muffins tender.
- Spoon the batter into the prepared muffin tin, filling each cup about three-quarters full. If desired, add a small dollop of peanut butter on top of each for extra gooeyness.
- Bake in the preheated oven for 20-25 minutes, until the tops are golden and cracked slightly, with a fragrant peanut aroma filling your kitchen.
- Remove the muffins from the oven and let them cool in the tin for about 5 minutes—this helps them set and makes removal easier.
- Transfer the muffins to a wire rack to cool completely or enjoy them warm, appreciating their rustic cracked tops and moist crumb.
- Serve these cozy muffins with a drizzle of honey or a sprinkle of coarse sea salt if desired, and enjoy their nostalgic peanutty aroma and satisfying texture.
Top baking tricks for perfect muffins
- Room temperature ingredients: Use softened peanut butter and eggs to ensure a smooth, even batter without lumps.
- Gentle folding: Mix the dry ingredients into the wet just until combined to keep muffins light and fluffy.
- Avoid overmixing: Overworking the batter can make muffins dense—fold until ingredients are just incorporated.
- Scooping tips: Use an ice cream scoop for even, mess-free portions that bake uniformly.
- Oven placement: Position the rack in the middle for even heat distribution and golden tops.
- Baking time: Check at 20 minutes; muffins are done when the tops are golden and a toothpick comes out clean.
- Cooling: Let muffins rest in the tin for 5 minutes before transferring to a wire rack to prevent sogginess.
Common mistakes and how to fix them
- FORGOT to preheat oven → Always preheat to ensure muffins rise properly.
- DUMPED too much flour → Measure accurately for the right batter consistency.
- OVER-TORCHED muffins → Bake at the right temp; check for golden tops at 20 minutes.
- UNDER-mixed batter → Gently fold until just combined to avoid dense muffins.
Quick fixes and pantry swaps
- If muffins crackle excessively, reduce oven temperature by 10°C (20°F).
- When batter is too thick, splash in a teaspoon of milk to loosen.
- Splash a little water on muffins if they appear dry during baking.
- Patch a soggy muffin by popping it back in the oven at 180°C (350°F) for 3 minutes.
- Shield muffins with foil if tops brown too quickly while the insides stay underdone.
Prep, store, and reheat tips
- Prepare the batter up to a day in advance; keep covered in the fridge to preserve freshness and avoid drying out.
- Store baked muffins in an airtight container at room temperature for up to 2 days; for longer storage, freeze for up to 3 months, wrapped tightly.
- Reheat muffins in the microwave for 15-20 seconds until warm; they develop a soft, moist texture with a fragrant peanut aroma.
- For best flavor, consume muffins within 2 days of baking; freezing can mute some of the fresh, nutty scent if stored too long.
Top questions about peanut butter muffins
1. Can I use crunchy peanut butter?
Yes, you can substitute crunchy peanut butter for creamy, which adds a nice texture but slightly alters the smoothness.
2. Can I make these dairy-free?
Absolutely. Use a plant-based milk like almond or oat milk; the muffins will be just as moist but with a different flavor nuance.
3. How do I know when the muffins are done?
Bake until the tops are golden and a toothpick inserted in the center comes out clean, about 20-25 minutes.
4. How should I store leftover muffins?
Store leftovers in an airtight container at room temperature for 2 days or freeze for longer storage. Reheat in the microwave for best softness.
5. Can I omit the vanilla?
Adding a teaspoon of vanilla extract enhances the nutty flavor, but you can skip it for a more straightforward peanut taste.
6. How do I avoid dense muffins?
Using a light hand when folding the dry ingredients prevents dense muffins. Mix just until combined — no vigorous stirring!
7. Can I make the muffins vegan or reduce sugar?
Replace honey or maple syrup with mashed banana for a healthier option that adds moisture and a hint of sweetness.
8. How do I get evenly sized muffins?
Use a muffin scoop for even portions, which helps them bake uniformly and reduces mess.
9. Why do my muffins crack too much?
If the tops crack excessively, lower the oven temperature slightly or cover with foil midway through baking.
10. Can I enhance the peanut flavor?
For a richer flavor, toast the peanut butter lightly before mixing, releasing fragrant oils and deepening the nutty aroma.
These peanut butter muffins are more than just a quick bake; they carry a piece of childhood chaos and comfort in every bite. The smell of roasted peanut and the soft crumb remind me that simple ingredients can turn into something warm and satisfying, especially when mornings get hectic or when a craving sneaks up on you.
Sharing these muffins feels like passing along a secret—messy, sweet, and honest. They’re perfect for holding onto that nostalgic feeling while keeping things practical and real in the kitchen.

Hey there, I’m Devon Harper. I run a small neighborhood café by day, cook most of my meals far too late at night, and write Midnight Grocery Runs somewhere in between. If you’ve ever wondered whether something simple could turn into something comforting after a long day, you’ll feel right at home here.


