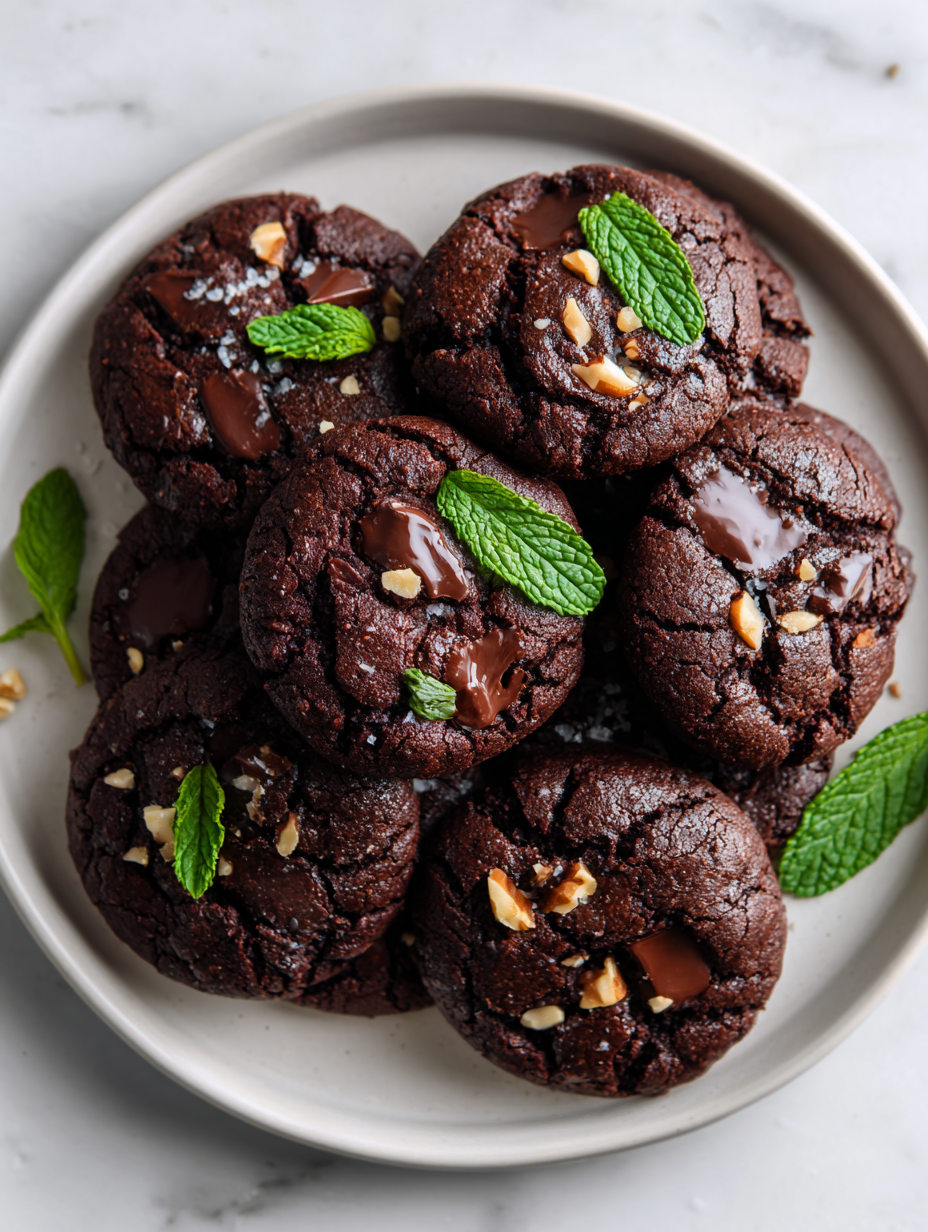
These chocolate brownie cookies started as a happy accident in my kitchen. I was aiming for a fudgy brownie, but I wanted something portable—something to grab on the go that still delivered that intense chocolate hit. The result is a cookie that’s crispy at the edges but gooey and rich in the middle, almost like a brownie in disguise.
What I love about this recipe is how it balances chaos and control. You get that deep cocoa aroma as they bake, a crackly top that shatters when you bite, and a melt-in-your-mouth center. It’s a messy, imperfect kind of treat that feels like a cozy secret—perfect for when you need a little chocolate comfort that’s easy to whip up and hard to forget.
This recipe focuses on combining the rich, fudgy depth of brownies with the portable, crispy edges of cookies, creating a hybrid treat that satisfies both craving for gooey chocolate and the satisfying crunch of a cookie. It’s about capturing the best of both worlds in one bite, perfect for when you want indulgence without the fuss of baking multiple batches.
The story behind this recipe
- This recipe came about after a lazy Sunday, when I realized I had a half-used bag of chocolate chips and a bunch of baking odds and ends. I didn’t want a full batch of brownies or cookies, so I started blending the two ideas. The first batch was a bit of a mess, but it had this incredible fudgy center and crispy edges that made me keep tweaking it.
- Now, I make these whenever I need a quick chocolate fix that’s a little different. They remind me of childhood weekends in the kitchen—messy, spontaneous, full of melting chocolate and a lot of taste-testing. It’s the kind of treat that feels both nostalgic and a little rebellious, like breaking the rules just for the fun of it.
- heading: ‘The story behind this recipe’
Ingredient breakdown: key components
- Unsweetened cocoa powder: I love the deep, smoky aroma it adds; if you want a milder flavor, try Dutch-processed cocoa, but skip the baking soda to avoid a metallic edge.
- Chocolate chips: I prefer semi-sweet for balance, but dark chocolate chips give a richer, more intense chocolate punch—just watch them melt into the dough, creating pockets of gooeyness.
- Butter: I use unsalted, melted and cooled—cream it with sugar until fluffy for a better cookie structure, or add a pinch of salt if your butter is unsalted for flavor balance.
- Brown sugar: I lean on dark brown for that caramel-ly richness, but light brown is fine if you want a slightly milder sweetness—adds a chewy bite, too.
- Eggs: I use large eggs at room temperature to help everything emulsify smoothly; for a fudgier texture, try adding an extra yolk, which boosts richness.
- Flour: I stick to all-purpose, but if I want a slightly chewier cookie, I mix in a tablespoon of vital wheat gluten—just enough to keep it tender but resilient.
- Vanilla extract: I always add a splash for depth—if you want a more intense flavor, double it, but don’t overdo it or it’ll overpower the chocolate.
Spotlight on key ingredients
Unsweetened cocoa powder:
- I love the deep, smoky aroma it adds; if you want a milder flavor, try Dutch-processed cocoa, but skip the baking soda to avoid a metallic edge.
- Chocolate chips: I prefer semi-sweet for balance, but dark chocolate chips give a richer, more intense chocolate punch—just watch them melt into the dough, creating pockets of gooeyness.
- Butter: I use unsalted, melted and cooled—cream it with sugar until fluffy for a better cookie structure, or add a pinch of salt if your butter is unsalted for flavor balance.
Chocolate chips:
- I prefer semi-sweet for balance, but dark chocolate chips give a richer, more intense chocolate punch—just watch them melt into the dough, creating pockets of gooeyness.
- Butter: I use unsalted, melted and cooled—cream it with sugar until fluffy for a better cookie structure, or add a pinch of salt if your butter is unsalted for flavor balance.
Notes for ingredient swaps
- Dairy-Free: Use coconut oil instead of butter for a subtly coconut flavor and a dairy-free treat.
- Sweetener Swap: Maple syrup or honey can replace sugar, but expect a denser, chewier cookie with a hint of floral sweetness.
- Flour Alternative: Almond or oat flour can be used for gluten-free options, though cookies may be slightly more fragile and have a nutty flavor.
- Chocolate Choices: Swap semi-sweet chips for dark chocolate or milk chocolate based on your taste—expect different intensity and creaminess.
- Cocoa Powder: Dutch-processed cocoa gives a smoother, less acidic flavor; natural cocoa adds a brighter, more robust chocolate punch.
- Extra Texture: Add chopped nuts or oats for crunch—just fold in at the end to preserve their texture.
- Salt: A pinch of flaky sea salt on top enhances the chocolate flavor—omit if you prefer a less salty finish.
Equipment & Tools
- Large mixing bowl: Combine ingredients thoroughly
- Whisk: Mix wet ingredients smoothly
- Spatula: Fold in dry ingredients and chocolate chips
- Baking sheets: Hold the cookies during baking
- Parchment paper: Prevent sticking and simplify cleanup
- Cookie scoop or spoon: Portion out dough evenly
- Wire rack: Cool cookies evenly without sogginess
Step-by-step guide to cookies
- Gather your equipment: a large mixing bowl, a whisk, a spatula, baking sheets, parchment paper, and a cookie scoop or spoon.
- Preheat your oven to 180°C (350°F). Line baking sheets with parchment—this prevents sticking and makes cleanup easier.
- Melt 115g (1/2 cup) unsalted butter in a small saucepan over low heat. Let it cool slightly; you don’t want it too hot or it’ll cook the eggs later.
- In your large bowl, whisk together 1/2 cup brown sugar and 1/4 cup granulated sugar until combined and slightly fluffy. Add the cooled melted butter and mix well.
- Stir in 1 large egg and 1 teaspoon vanilla extract. Whisk until the mixture looks glossy and smooth, about 30 seconds.
- Sift together 1/2 cup unsweetened cocoa powder, 1/4 teaspoon baking powder, and 1/4 teaspoon salt. Gently fold into the wet ingredients until just combined.
- Fold in 3/4 cup semi-sweet chocolate chips, making sure they’re evenly distributed. The batter will be thick and fudgy.
- Using a cookie scoop or spoon, portion out dollops of batter onto your prepared baking sheets, spacing them about 2 inches apart as they spread.
- Bake for 10-12 minutes. Don’t overbake—look for edges that are set but centers still look slightly soft and glossy.
- At the 10-minute mark, gently shake the baking sheet; if the cookies jiggle just a little, they’re ready. If they look too wet, give them another minute.
- Remove from oven and let the cookies rest on the baking sheet for 5 minutes. They’ll firm up as they cool but remain soft in the middle.
- Transfer cookies to a wire rack to cool completely or enjoy warm—just watch the gooey chocolate melt on your fingers.
- Finish with a light sprinkle of sea salt or extra chocolate chips if you like. Serve with a glass of milk or a scoop of vanilla ice cream.
Let the cookies rest on the baking sheet for 5 minutes, then transfer to a wire rack to cool completely. Serve warm or at room temperature. For storage, keep in an airtight container for up to 3 days or freeze for longer keeping.
How to Know It’s Done
- Edges are golden and set, center is slightly soft but not runny.
- Cookie cracks on top, revealing a fudgy interior.
- Chocolate chips are melted but not burnt, and smell rich with cocoa.
Chocolate Brownie Cookies
Ingredients
Equipment
Method
- Begin by preheating your oven to 180°C (350°F) and lining your baking sheets with parchment paper.
- Melt the unsalted butter in a small saucepan over low heat until just liquid, then let it cool slightly so it doesn’t cook the egg later.
- In a large mixing bowl, whisk together the brown sugar and granulated sugar until combined and slightly fluffy, then pour in the cooled melted butter and stir until smooth.
- Add the large egg and vanilla extract to the sugar mixture and whisk until the mixture looks glossy and well combined, about 30 seconds.
- Sift the cocoa powder, baking powder, and salt into the wet ingredients to prevent lumps, then gently fold everything together with your spatula until smooth and thick.
- Stir in the semi-sweet chocolate chips evenly throughout the dough, making sure they’re well distributed.
- Using a cookie scoop or spoon, portion out dollops of dough onto your prepared baking sheets, spacing them about 2 inches apart as they will spread slightly during baking.
- Bake the cookies for 10-12 minutes until the edges are set and slightly crisp, but the centers still look soft and fudgy.
- Once baked, remove the cookies from the oven and let them cool on the baking sheet for about 5 minutes to firm up.
- Transfer the cookies to a wire rack to cool completely, or enjoy them warm for that gooey, chocolatey experience.
- Finish by sprinkling a tiny pinch of sea salt on top if desired, then serve and enjoy these decadent brownie cookies.
Tips & Tricks for Best Results
- Chill the dough briefly before scooping—this helps maintain shape during baking.
- Use a light hand when folding in chocolate chips—overmixing can make cookies tough.
- For a shinier top, brush the cookies with a little egg wash before baking.
- Rotate your baking sheet halfway through to ensure even browning.
- Slightly underbake for ultra-fudgy centers—they’ll firm up as they cool.
- Sift cocoa powder to prevent lumps and ensure a smooth, glossy batter.
- Add a pinch of sea salt on top just before baking—this enhances the chocolate depth.
Common mistakes and how to fix them
- FORGOT to check oven temperature → Use an oven thermometer for accuracy.
- DUMPED in all ingredients at once → Mix wet and dry separately before combining.
- OVER-TORCHED cookies → Remove them earlier; they continue cooking after baking.
- MISSED the resting time → Let cookies cool for at least 5 minutes to set properly.
Quick kitchen fixes
- If cookies spread too thin, chill the dough 30 minutes before baking.
- When chocolate chips aren’t melting, slightly warm the dough for better distribution.
- Splash a few drops of milk if batter feels too stiff to fold in evenly.
- Patch cracks by gently pressing dough back together before baking.
- Shield burnt edges with aluminum foil during last few minutes of baking.
Prep, store, and reheat tips
- Prepare the dough up to 24 hours in advance; keep covered in the fridge to develop richer chocolate notes.
- Store baked cookies in an airtight container at room temperature for up to 3 days, maintaining their chewy edges and fudgy centers.
- Freeze unbaked dough balls for up to 1 month; bake directly from frozen, adding an extra minute or two for doneness.
- Reheat cookies in a 150°C (300°F) oven for 5 minutes until warm and gooey, allowing the chocolate to reignite its melt.
- For maximum freshness, re-crisp cookies by briefly toasting in a low oven—watch for that crackly top to shimmer again.
Top questions about brownie cookies
1. Can I substitute butter with oil?
Yes, you can use melted butter or oil, but the texture might be slightly less chewy. Try to keep the amount similar to the recipe for best results.
2. Can I use different chocolate chips?
Absolutely, using dark chocolate chips enhances the rich, intense chocolate flavor. Semi-sweet is milder, while milk chocolate makes them sweeter.
3. How do I tell when they’re done?
If you underbake slightly, the centers stay gooey and fudgy. Overbaking makes them crisp and less moist inside.
4. How should I store these cookies?
Storing in an airtight container at room temperature keeps them fresh for about 3 days. Freezing dough is perfect for prepping ahead.
5. Should I add salt on top?
Adding a pinch of sea salt on top before baking enhances the chocolate’s depth and balances the sweetness.
6. Can I make these gluten-free?
You can swap with gluten-free flour blends, but expect a slightly different texture—more fragile or crumblier.
7. Should I chill the dough first?
Chilling the dough for 30 minutes helps prevent spreading and creates thicker, chewier cookies.
8. Can I reheat leftovers?
Yes, these cookies reheat well in a warm oven or microwave for a few seconds until gooey and fragrant.
9. Does the cocoa quality matter?
Using high-quality cocoa powder makes a noticeable difference—richer aroma and a more profound chocolate flavor.
10. How do I avoid overmixing?
Mix the dry ingredients gently to keep the dough tender and avoid tough cookies. Overmixing can develop gluten and make them dense.
Baking these cookies feels like a small act of rebellion—cracking through that crackly top to reveal the fudgy, molten center. They remind me how a little improvisation in the kitchen can turn into something unexpectedly satisfying, especially when chocolate is involved.
In the end, it’s about those moments of messy joy—sharing a warm cookie, feeling the rich aroma fill the room, and knowing that sometimes, simple ingredients create the most memorable bites. That’s what makes this recipe worth keeping around.

Hey there, I’m Devon Harper. I run a small neighborhood café by day, cook most of my meals far too late at night, and write Midnight Grocery Runs somewhere in between. If you’ve ever wondered whether something simple could turn into something comforting after a long day, you’ll feel right at home here.


