This brownie recipe is all about quick fixes and satisfying that sweet tooth fast. It’s perfect for those busy weeknights when you want something homemade but don’t have hours to spare. The secret is in a few simple ingredients, a short bake, and keeping that center gooey and rich, no matter how rushed you are. I’ve tweaked this over the years to make it foolproof and practically foolproof, honestly.
Baking these brownies feels like a tiny rebellion—like you’re giving yourself a break, even if just for a little bit. There’s comfort in knowing you can whip up something indulgent with minimal fuss, and the smell alone—melted chocolate, a little caramelized sugar—makes the whole house cozy. It’s a little reminder that sometimes, the best things come together fast and don’t need perfection to be deeply satisfying.
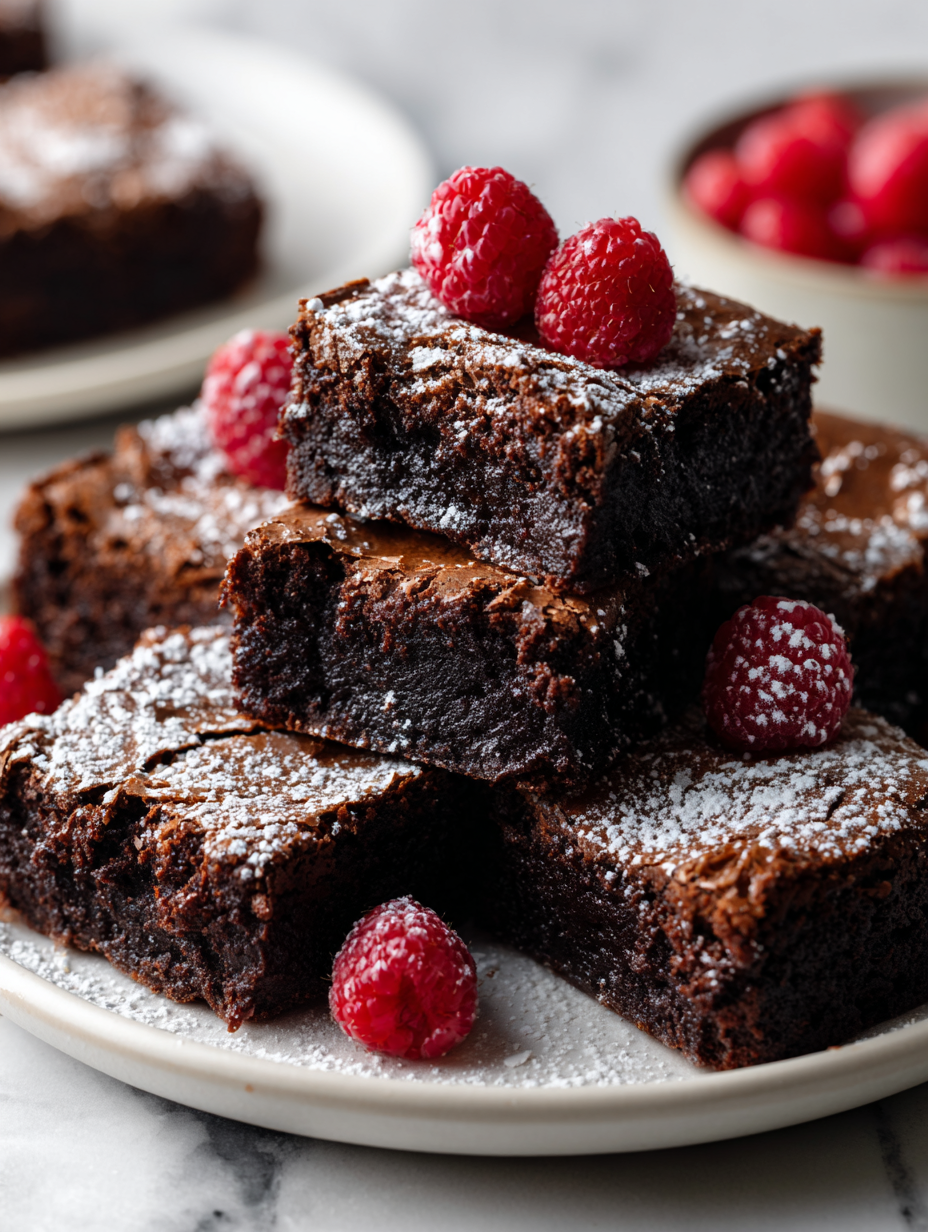
So grab those ingredients, maybe a glass of milk, and let’s get these brownies into your hands. They’re a little messy, a little imperfect, but totally worth it—especially when you’re craving something rich, chocolatey, and just a bit gooey inside. This recipe is about making something delicious, without the fuss, right when you need it most.
Focusing on how to adapt a classic brownie recipe for a busy weeknight treat, emphasizing quick prep, minimal ingredients, and a slightly gooey center that stays moist despite rushed baking.
The story behind this recipe
- This brownie recipe started from a batch I made during a chaotic week where I needed something quick but satisfying. I remember the smell of melting chocolate filling the kitchen, instantly calming the rush and noise around me. It’s funny how a simple dessert can ground you, even in a whirlwind of a day.
- One day, I realized I was always tweaking my brownies—less sugar, more cocoa, a pinch of sea salt—to get that perfect balance of gooey and rich. Sharing these with friends turned into a little tradition, a moment of pause amid busy lives. That’s when I knew this recipe was worth holding onto, just a little bit improvised but fundamentally honest.
- heading: The story behind this recipe
Ingredient breakdown
- Unsweetened cocoa powder: I love the deep, slightly bitter kick it adds. If you want a richer flavor, go for Dutch-processed; for a more intense chocolate punch, use natural cocoa. It’s the backbone of that velvety brownie bite.
- Good-quality dark chocolate: I prefer a bar with at least 70% cacao—melts into a gooey, rich mess that coats your tongue. If you’re in a pinch, chocolate chips work, but chopping a bar makes a noticeable difference in texture and flavor.
- Butter: I use salted butter for a balanced richness, but unsalted is fine if you prefer control over salt levels. Melt it gently until it’s glossy and smells warm and toasty—that’s when you know it’s ready to mix.
- Granulated sugar: I stick with white sugar for that clean sweetness that helps the brownie rise slightly and develop a shiny crust. Brown sugar could add a caramel note, but I like the clarity of flavor here, especially if you want a more traditional brownie.
- Eggs: I always use large eggs, at room temperature. They give structure and a tender crumb. If you forget to take them out, just warm them in hot water for a few minutes—makes mixing so much easier and the batter smoother.
- All-purpose flour: I keep it simple with plain flour, but if you want a chewier brownie, a touch of bread flour can give more structure. Don’t overmix once your flour is in—that’s how you get a dense, tough crust. Mix just until combined.
- Vanilla extract: I use pure vanilla for that subtle warmth and aroma. It enhances the chocolate without overpowering. If you’re out, a splash of almond extract can add a nutty twist, but keep it subtle.
Spotlight on key ingredients
Dark chocolate:
- I love how it melts into a silky, rich goo that coats your tongue. It’s the core of that deep chocolate flavor.
- When baking, it becomes oozy and shiny, creating that luscious texture we crave in brownies. Chopping a bar rather than using chips makes a noticeable difference in smoothness.
Cocoa powder:
- Unsweetened cocoa powder: The backbone of the flavor—adds a bitter, aromatic punch. Dutch-processed gives a smoother, less acidic note, natural cocoa is more punchy and lively.
- It behaves like a sponge, soaking up heat and releasing a smoky, chocolate scent during baking that makes the house smell incredible.
Notes for ingredient swaps
- Dairy-Free: Swap butter for coconut oil or vegan margarine. It keeps the brownies moist but adds a subtle coconut aroma.
- Sugar Alternatives: Use maple syrup or honey instead of granulated sugar. Expect a slightly denser crumb and a hint of caramel.
- Gluten-Free: Replace all-purpose flour with almond or oat flour. The texture will be a bit more tender and crumbly.
- Vegan: Use plant-based butter and flaxseed meal (1 tablespoon flaxseed + 3 tablespoons water per egg). The flavor shifts slightly, but still rich.
- Nutty Boost: Add chopped nuts or swap some flour for ground almonds. They give a toasty crunch and richer taste.
- Extra Cocoa: Double the cocoa powder for an ultra-chocolaty punch. The brownies will be darker and more intense.
- White Chocolate: Substitute dark chocolate with chopped white chocolate for a sweeter, creamier variation.
Equipment & Tools
- Oven: For baking the brownies evenly at the correct temperature.
- Mixing bowls: To combine ingredients without mess.
- Microwave-safe bowl: To melt chocolate and butter quickly and smoothly.
- Spatula: To fold ingredients and spread batter evenly.
- 20cm (8-inch) square baking pan: To shape the brownies and bake them uniformly.
- Toothpick or cake tester: To test doneness of the baked brownies.
Step-by-step guide to brownies
- Preheat your oven to 175°C (350°F). Grease a 20cm (8-inch) square baking pan with butter or line it with parchment paper for easy removal.
- Melt 150g (5 oz) of good-quality dark chocolate and 115g (1/2 cup) of butter together in a microwave-safe bowl. Stir until smooth and glossy, then set aside to cool slightly.
- In a mixing bowl, whisk together 200g (1 cup) of granulated sugar, 2 large eggs, and 1 teaspoon of vanilla extract until combined and slightly frothy, about 1-2 minutes.
- Gradually fold in the cooled chocolate-butter mixture into the egg mixture. Make sure to mix well but gently to keep the batter airy.
- Sift in 100g (3/4 cup) of all-purpose flour and 30g (1/4 cup) of unsweetened cocoa powder. Fold just until no streaks remain—don’t overmix, or the brownies will be dense.
- Pour the batter into your prepared pan, spreading it evenly with a spatula. Tap the pan lightly on the counter to smooth out the surface and release any air bubbles.
- Bake for 20-25 minutes. The edges should look firm and slightly crackled, while the center still feels a little jiggly when gently shaken.
- Check for doneness: Insert a toothpick into the center—if it comes out with moist crumbs, it’s perfect. The top should be shiny and cracked, with a faint aroma of chocolate.
- Let the brownies rest in the pan for at least 15 minutes. Then, transfer to a wire rack and cool completely before slicing for cleaner edges.
- Serve slightly warm or at room temperature. The middle should be gooey and dense, with a rich chocolate aroma. Enjoy every bite!
Allow brownies to cool in the pan for 15 minutes, then transfer to a wire rack. Slice into squares with a sharp knife, wiping it clean between cuts. Serve at room temperature or slightly warmed for best gooey texture.
How to Know It’s Done
- Edges are set and slightly crackled, center still jiggles slightly when shaken.
- Toothpick inserted in the middle comes out with moist crumbs, not wet batter.
- Chocolate smell is rich and inviting, with a glossy surface on top.
Quick Gooey Brownies
Ingredients
Equipment
Method
- Chop the dark chocolate into small pieces and set aside. Melt the chocolate and butter together in a microwave-safe bowl in 30-second bursts, stirring until smooth and glossy. Let it cool slightly while you prepare the next steps.
- In a large mixing bowl, whisk together the sugar, eggs, and vanilla extract until the mixture is slightly frothy and well combined, about 1-2 minutes.
- Pour the cooled chocolate and butter mixture into the egg mixture, gently folding with a spatula until fully incorporated and smooth.
- Sift together the flour and cocoa powder, then gently fold them into the wet mixture just until no streaks remain. Be careful not to overmix to keep the brownies tender.
- Pour the batter into a greased or parchment-lined 8-inch square baking pan, spreading it evenly with a spatula for a smooth top.
- Bake in a preheated oven at 175°C (350°F) for about 20-25 minutes. The edges should be set and slightly cracked, while the center remains soft and slightly jiggly when shaken gently.
- Insert a toothpick into the center—if it comes out with moist crumbs and no wet batter, the brownies are ready. Remove from the oven and allow to cool in the pan for at least 15 minutes.
- Transfer the brownies to a wire rack to cool completely, then slice into squares. The center should be gooey and rich, with a shiny, cracked top. Serve warm or at room temperature for the best experience.
Pro tips for perfect brownies
- Use high-quality chocolate for a richer, deeper flavor that melts into a silky, oozy center.
- Slightly underbake—center should jiggle gently—your brownies stay gooey and moist without overcooking.
- Sift your cocoa and flour together to avoid lumps and ensure a smooth, even batter before mixing.
- Mix just until ingredients are combined—overmixing develops gluten and makes brownies dense and tough.
- Let baked brownies rest for at least 15 minutes—this helps set the structure and makes slicing cleaner.
- For extra flavor, toast your nuts lightly before adding—they bring out a warm, toasty aroma that complements the chocolate.
- Add a pinch of sea salt on top just before baking—enhances the chocolate flavor and balances sweetness.
Common mistakes and how to fix them
- FORGOT to check oven temperature → Use an oven thermometer for accuracy.
- DUMPED in all ingredients at once → Add ingredients gradually for better texture.
- OVER-TORCHED the brownies → Remove when edges are set but center is still gooey.
- UNDER-baked and dry → Bake a few extra minutes until a toothpick comes out with moist crumbs.
Quick fixes for common issues
- If brownies are gummy in the center → Splash a little extra baking time, then check for doneness again.
- When brownies crack on top → Patch with a drizzle of melted chocolate or serve warm for a fudgy look.
- Splash a pinch of sea salt on top before baking → It enhances chocolate aroma and balances sweetness.
- Dumped ingredients in the wrong order → Add eggs gradually, then fold in melted chocolate for a smooth batter.
- When edges burn before center is done → Shield with foil and lower oven temp slightly for a gentler bake.
Prep, store, and reheat tips
- Prepare the batter entirely ahead of time, then cover tightly and refrigerate for up to 24 hours. The flavors meld, and the batter firms up slightly, making it easier to pour and bake later.
- Brownies taste best when fresh, but can be stored at room temperature in an airtight container for up to 3 days—moist and chewy inside, with a slightly softer crust. Keep away from direct sunlight to prevent melting or sweating.
- For longer storage, wrap individual brownies or the whole batch in plastic wrap and freeze for up to 3 months. Thaw at room temperature for 30 minutes before serving; they reheat well in a low oven or microwave, maintaining that gooey center.
- Reheating brownies: warm a slice in the microwave at 50% power for about 15-20 seconds until just warm and fragrant. The edges will crisp slightly, and the chocolate aroma will intensify, reminiscent of freshly baked.
Top questions about brownies
1. Can I make brownies vegan?
Yes, you can substitute applesauce or banana for eggs, but expect a slightly denser, moister brownie texture.
2. What’s the best chocolate for brownies?
Using high-quality dark chocolate makes a noticeable difference; less waxy, richer flavor, melts into a velvety center.
3. How do I know when brownies are done?
Overbaking leads to dry brownies; check them at 20 minutes, and look for a shiny, cracked top that still jiggles slightly.
4. Should I add salt to my brownies?
Adding a pinch of sea salt on top before baking enhances the chocolate flavor and cuts through sweetness.
5. How do I get fudgier brownies?
For fudgier brownies, slightly underbake and let them rest; they will firm up as they cool, keeping that gooey center.
6. How should I store baked brownies?
Storing brownies in an airtight container at room temp keeps them moist for up to 3 days; refrigerate for longer shelf life.
7. How do I reheat brownies?
To reheat, microwave a slice at 50% power for 15-20 seconds until warm and fragrant, restoring that just-baked feel.
8. Chips or bar chocolate, which is better for brownies?
Using chopped bar chocolate instead of chips creates a more luxurious, melty texture that coats your mouth in rich cocoa.
9. Can I add extras to my brownies?
Adding nuts or a swirl of caramel before baking can elevate the flavor and add contrasting textures.
10. What if my brownies are too dry?
If your brownies turn out dry, try reducing baking time or covering them with foil partway through baking.
Baking these brownies is a small act of rebellion against busy days. Their rich aroma and gooey center make every moment in the kitchen worth it. Sometimes, it’s the simple things—like a warm, chocolatey slice—that bring a little quiet joy.
No matter how many times I make them, I’m always surprised how quickly they disappear. There’s no need for perfection—just good chocolate, a little patience, and the freedom to enjoy every fudgy bite. That’s what makes this recipe a constant go-to.

Hey there, I’m Devon Harper. I run a small neighborhood café by day, cook most of my meals far too late at night, and write Midnight Grocery Runs somewhere in between. If you’ve ever wondered whether something simple could turn into something comforting after a long day, you’ll feel right at home here.


