There’s something about the way chocolate fudge bars crumble at the edges, leaving behind a slightly cracked, caramelized border that always takes me back. It’s that imperfect charm—the sticky, gooey center giving way to a crumbly shell—that makes these treats feel like a secret from the past, shared only in quiet kitchen moments or late-night snack raids. Baking them feels like a small act of rebellion, a nostalgic nod to childhood afternoons spent sneaking bites before anyone else was awake.
I love how these bars aren’t about perfection. They’re about the messy, honest joy of melting chocolate, the way sugar and butter bubble into a rich, fragrant caramel, and how each bite carries a little bit of chaos—an edge that’s slightly uneven, a chewy center that’s just the right amount of indulgent. It’s a recipe that’s forgiving enough to adapt, yet still rooted in the comforting familiarity of chocolate and butter—simple ingredients, honest results.
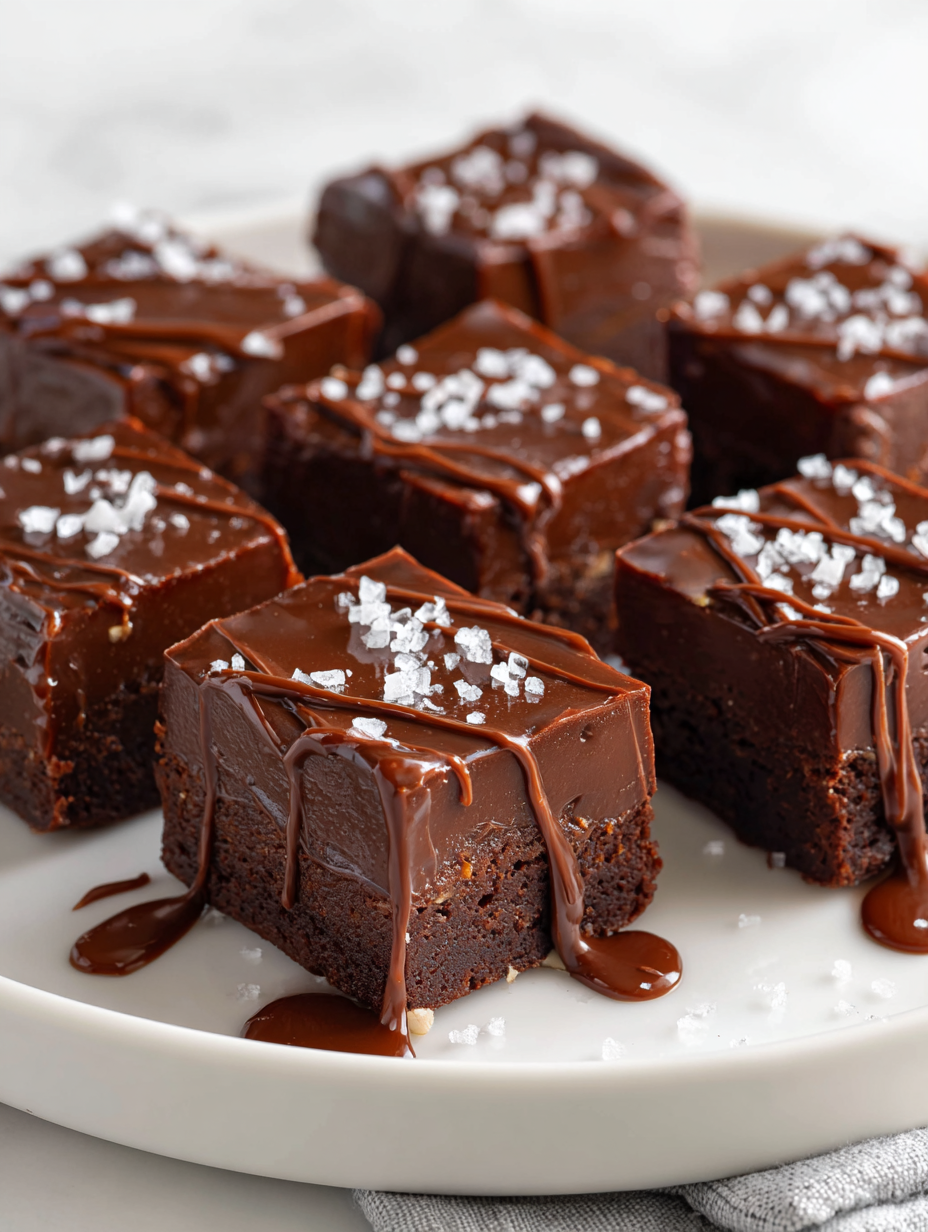
Focusing on the nostalgic comfort of childhood treats, this recipe emphasizes the imperfect, crumbly edges and gooey centers that remind me of weekend bakeries and late-night kitchen raids.
The story behind this recipe
- This recipe was born out of a messy Sunday baking session in my old kitchen, where I was trying to recreate a childhood favorite that my grandma used to make. I remember the smell of melting chocolate and the way the edges would crackle when they came out of the oven—those little imperfections made the treat feel so alive, so real. It’s funny how one batch can bring back such vivid memories, like a snapshot of simpler times when sweets were just about sharing with family or sneaking a piece in secret.
- I’ve tweaked it over the years, but the core stays the same—rich, gooey, slightly crumbly, and absolutely addictive. Every time I make these, I think about how comfort food doesn’t need to be fancy or perfect. It just needs to be honest, a little imperfect, and deeply satisfying—like a little piece of childhood I can still taste.
- heading
- story_type
Ingredient breakdown
- Unsweetened cocoa powder: I love that deep, slightly bitter flavor it adds—if you prefer a milder chocolate, swap half with Dutch-processed cocoa for a smoother, less intense punch.
- Heavy cream: It makes the fudge super creamy and melts beautifully—if you want a lighter version, try full-fat coconut milk, but expect a coconut aroma and slightly different texture.
- Butter: I use salted butter for richness, but if you want less salt, switch to unsalted and add a pinch of sea salt at the end for balance.
- Dark chocolate chips: Their glossy, rich melt is what makes the fudge feel indulgent—if you’re out, chopped baking chocolate works just as well, just keep an eye on the melting process.
- Vanilla extract: It brightens everything up with a subtle warmth—if you prefer a more intense vanilla flavor, use vanilla bean paste, which adds visible flecks and a richer aroma.
- Sugar: I rely on a good amount of sugar to balance the bitterness—if you want a less sweet bar, cut back slightly, but don’t go below ¾ cup or it’ll affect the fudge’s structure.
- Sweetened condensed milk: This is the magic ingredient for that chewy, gooey interior—if you need dairy-free, coconut condensed milk is a decent swap, though it brings a coconut undertone.
Spotlight on key ingredients
Unsweetened cocoa powder:
- I love that deep, slightly bitter flavor it adds—if you prefer a milder chocolate, swap half with Dutch-processed cocoa for a smoother, less intense punch.
- Heavy cream: It makes the fudge super creamy and melts beautifully—if you want a lighter version, try full-fat coconut milk, but expect a coconut aroma and slightly different texture.
- Chocolate chips: Their glossy, rich melt is what makes the fudge feel indulgent—if you’re out, chopped baking chocolate works just as well, just keep an eye on the melting process.
Sweetened condensed milk:
- Butter: I use salted butter for richness, but if you want less salt, switch to unsalted and add a pinch of sea salt at the end for balance.
- This is the magic ingredient for that chewy, gooey interior—if you need dairy-free, coconut condensed milk is a decent swap, though it brings a coconut undertone.
Notes for ingredient swaps
- Dairy-Free: Swap heavy cream with full-fat coconut milk for a rich, slightly coconutty flavor that still melts smoothly.
- Vegan Chocolate: Use dairy-free dark chocolate chips or chopped vegan baking chocolate to keep it intensely chocolatey without dairy.
- Sweetener: Replace granulated sugar with maple sugar or coconut sugar for a caramel note; keep in mind they may alter sweetness slightly.
- Butter: Substitute with coconut oil or vegan butter for a dairy-free version—expect a subtler richness and a hint of coconut.
- Chocolate Chips: Try chopped baking chocolate or cacao nibs for a different texture and deep cocoa flavor, especially if you want less sweetness.
- Vanilla: Use vanilla bean paste instead of extract for richer aroma and visible flecks, adding depth to the fudge.
- Sweetened Condensed Milk: For a dairy-free option, coconut condensed milk works well, though it adds a faint coconut scent and flavor.
Equipment & Tools
- 9×9 inch baking pan: Holds the fudge mixture and shapes the bars.
- Parchment paper: Prevents sticking and makes removal easier.
- Saucepan: Melts butter and cooks the fudge base.
- Heatproof spatula: Stirs and combines the ingredients smoothly.
Step-by-step guide to fudge bars
- Equipment & Tools: Gather a 9×9 inch baking pan (for even edges), a heatproof spatula (for mixing), a saucepan (for melting), and parchment paper (to prevent sticking).
- Line the pan with parchment, leaving overhang for easy removal. Set aside.
- In the saucepan, melt 1/2 cup (115g) unsalted butter over low heat, just until it starts to shimmer—about 2 minutes. Watch for a faint aroma of toasted butter.
- Add 1 1/4 cups (220g) sugar and 1/4 cup (25g) unsweetened cocoa powder. Stir constantly until the mixture is glossy and smooth, about 3 minutes. It should smell rich and chocolatey.
- Pour in 1/2 cup (120ml) heavy cream and stir until fully incorporated. The mixture will bubble up slightly; keep stirring until it’s thickened, about 2 minutes.
- Remove from heat and stir in 1 teaspoon vanilla extract and 1 cup (170g) chocolate chips. Wait until the chips melt into the mixture, then stir until smooth.
- Pour the mixture into the prepared pan, spreading evenly with the spatula. Tap the pan gently to settle the surface, then smooth with the back of a spoon.
- Bake at 180°C (350°F) for 20-25 minutes. The edges should look set and slightly pull away from the pan, with a crackled surface developing.
- Check doneness by gently jiggling the pan—center should wobble slightly but not be liquid. The top should be firm and shiny.
- Remove from oven and let cool in the pan for 15 minutes. Then, lift out using the parchment overhang and transfer to a wire rack.
- Allow to cool completely—about 1 hour—until the fudge is firm. For cleaner cuts, refrigerate for 30 minutes before slicing.
- Cut into squares with a sharp knife. Serve at room temperature for maximum gooey texture, or chilled for a firmer bite.
Let the fudge cool completely in the pan, then transfer to a wire rack. Slice into squares with a sharp knife. Serve at room temperature or chilled, depending on your texture preference.
How to Know It’s Done
- Edges look slightly cracked and pull away from the sides of the pan.
- Center jiggles just slightly when shaken, but isn’t liquid.
- Surface is shiny and set, with a crackled top.
Chocolate Fudge Bars
Ingredients
Equipment
Method
- Line your 9x9 inch baking pan with parchment paper, leaving overhang on the sides for easy removal.
- In a saucepan over low heat, melt the butter gently until it starts to shimmer and smells toasted—about 2 minutes.
- Add the sugar and cocoa powder to the melted butter, stirring constantly until the mixture becomes glossy and smooth, about 3 minutes; it should smell rich and chocolatey.
- Pour in the heavy cream and stir until the mixture bubbles and thickens, about 2 minutes; it will look glossy and slightly viscous.
- Remove the pan from heat and stir in vanilla extract. Then add the chocolate chips, waiting for them to melt into the mixture, stirring until smooth and shiny.
- Pour the thick, glossy fudge mixture into your prepared pan, spreading it evenly with a spatula and gently tapping the pan to settle the surface and remove air bubbles.
- Bake in a preheated oven at 180°C (350°F) for 20-25 minutes. The edges should crack and pull away from the sides, with a shiny, crackled top.
- Remove the pan from the oven and let it cool in the pan for 15 minutes; the surface should be set and crackled.
- Lift the fudge out using the parchment overhang and transfer it to a wire rack to cool completely, about an hour, until firm.
- Once cooled, refrigerate for 30 minutes to firm up for cleaner slicing.
- Use a sharp knife warmed slightly in hot water to cut neat squares, then serve at room temperature or chilled for a gooey or firm texture.
Tips and tricks for perfect fudge
- Bolded mini-head: Use a silicone spatula for gentle folding—keeps the fudge smooth and prevents overmixing.
- Bolded mini-head: Lightly toast the cocoa powder before adding—enhances depth and brings out a richer chocolate aroma.
- Bolded mini-head: Keep the heat low during melting—avoids scorching and ensures silky, glossy fudge.
- Bolded mini-head: Gently tap the pan on the counter after pouring—removes air bubbles and evens out the surface.
- Bolded mini-head: Chill the fudge before slicing—makes cleaner cuts and helps the texture set perfectly.
- Bolded mini-head: For softer bars, slightly underbake—edges might be a bit gooey, but that’s what makes them special.
- Bolded mini-head: Store in an airtight container at room temp for up to 3 days—keeps the fudge soft and shiny.
Common mistakes and how to fix them
- FORGOT to preheat the oven → Preheat oven to 180°C (350°F) before starting.
- DUMPED ingredients in haphazardly → Add ingredients in order, stirring after each for even melting.
- OVER-TORCHED the chocolate → Melt over low heat, stirring constantly to prevent burning.
- MISSED the cooling step → Cool completely before slicing to prevent crumbling.
Quick fixes and pantry swaps
- When in doubt, splash a little hot water on the edges to loosen stuck fudge.
- If it’s crumbly, patch with a dab of warm chocolate and re-chill.
- DUMPED too much sugar? Stir in a splash of cream to balance sweetness and moisture.
- Overcooked the chocolate? Shield with a sprinkle of sea salt and serve for a salty-sweet contrast.
- When fudge shimmers but cracks when sliced, refrigerate 10 more minutes for firmness.
Prep, store, and reheat tips
- Prep the fudge mixture up to a day ahead; keep it covered tightly in the fridge. The flavors meld and develop a richer chocolate aroma overnight.
- Store the cooled, sliced bars in an airtight container at room temperature for up to 3 days. The edges stay crumbly, and the center remains gooey if not refrigerated.
- For longer storage, freeze the bars wrapped individually in plastic wrap and then in foil. They keep well for up to 2 months, with the chocolate maintaining a glossy sheen upon thawing.
- Reheat slices gently in the microwave at 20-second intervals. Expect the chocolate to soften and release a tempting, warm cocoa scent, perfect for a quick indulgence.
- If the fudge feels too firm after refrigeration, let it sit at room temperature for 10-15 minutes before serving to restore its chewy, gooey texture.
Top questions about fudge bars
1. How do I know when the fudge bars are done?
Look for a shiny, crackled top and a slight jiggle in the center. The edges should be set and pull away slightly from the pan. If it passes these, it’s ready.
2. How should I store leftover fudge bars?
You can store the bars in an airtight container at room temperature for up to 3 days or freeze them for longer. Reheat briefly in the microwave to soften.
3. How do I cut the fudge neatly?
Use a sharp knife warmed slightly in hot water for clean cuts. Chill the fudge for 30 minutes before slicing for best results.
4. Can I make these dairy-free?
Yes, you can swap coconut condensed milk for regular, but it will alter the flavor and make the texture slightly less chewy.
5. How can I enhance the flavor of the fudge?
Adding a pinch of sea salt on top before baking enhances chocolate flavor and balances sweetness. It’s a simple upgrade with big impact.
6. What if my fudge turns out too crumbly or too soft?
If the fudge is too crumbly, gently reheat for a few seconds or add a touch more cream. For too soft, chill longer or bake a minute less.
7. What’s the best chocolate to use?
Use high-quality chocolate chips or chopped baking chocolate for the best melt and flavor. Cheaper brands may not melt as smoothly.
8. Can I customize the fudge bars?
You can add chopped nuts, swirls of peanut butter, or a sprinkle of flaky sea salt on top before cooling for extra flavor and texture.
9. How do I prevent the fudge from crumbling?
Yes, refrigerate the bars for 30 minutes before slicing to help them set and make cutting easier without crumbling.
10. How do I fix sticky or firm fudge?
If the fudge is too sticky, dust the knife with a little cocoa powder or warm it slightly. If too firm, let it sit at room temperature for a few minutes.
Baking these fudge bars takes me back to lazy afternoons in my childhood kitchen, where the smell of melting chocolate filled the air and every bite was a little piece of comfort. They’re messy, imperfect, and deeply satisfying—just how a good treat should be. Sharing them now feels like passing on a secret, a nostalgic reminder that sometimes, simple ingredients make the best memories.
In the end, these bars aren’t just about the rich, gooey chocolate—they’re about those small, honest moments of joy that stick with you long after the last crumb.

Hey there, I’m Devon Harper. I run a small neighborhood café by day, cook most of my meals far too late at night, and write Midnight Grocery Runs somewhere in between. If you’ve ever wondered whether something simple could turn into something comforting after a long day, you’ll feel right at home here.


