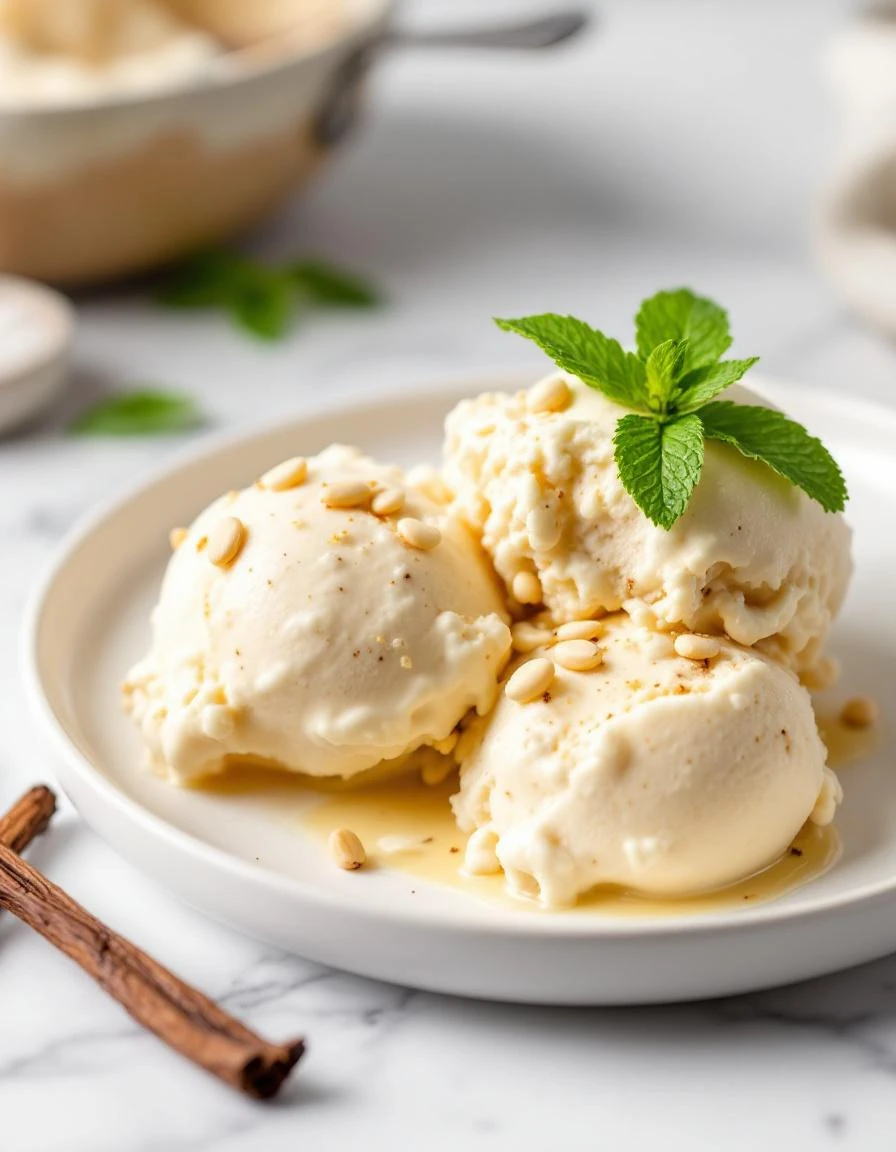
Making vanilla bean ice cream means dealing with a sticky mess when you scrape out the tiny seeds, which are oily and fragrant enough to stick to your hands. You’ll see flecks of black speckling the cream, and smell that floral, sweet aroma every time you stir the custard. It’s hands-on, no fancy gadgets needed—just a bowl, a whisk, and patience as you chill the mixture.
Churning is just as tactile—the whirring of the machine, the slight resistance as the ice cream thickens, and that satisfying scrape of soft, frozen custard from the paddle. Once it’s in the freezer, it takes hours to firm up, so you’ll be waiting, spoons in hand, for that first scoop to crack through the icy crust.
The tiny black seeds of the vanilla bean, when scraped out, feel oily and sticky between your fingers, releasing a sweet, floral aroma that sticks to your skin.
What goes into this dish
- Vanilla beans: I scrape out the tiny, oily seeds with a dull knife, the aromatic flecks sticking to my fingers—skip if you can’t find fresh beans, but the flavor’s brighter and more floral. Use vanilla extract in a pinch, but you lose that speckled look and intensity.
- Heavy cream: Whipping cream makes the ice cream rich and velvety; if you want lighter, swap some with whole milk, but it’ll be less creamy and more like soft custard. Keep it cold for best results, especially in warmer weather when it might turn buttery.
- Sugar: I prefer superfine sugar—it dissolves faster and leaves no gritty texture. Brown sugar adds a caramel note, but if you’re out, honey or maple syrup work, though they’ll tweak the flavor and make the custard slightly more viscous.
- Egg yolks: They give the custard body and a silky feel—skip if you’re vegan, but then you’ll need a thickener like cornstarch. Fresh yolks give a brighter, more vibrant custard; powdered yolk or egg substitute alters the richness.
- Milk: Whole milk is the standard, but skim or almond milk can be used for a lighter version. Just know it’ll be less thick and creamy, and the vanilla’s flavor might stand out more without the richness of cream.
- Salt: A pinch heightens the vanilla’s floral notes—omit if you’re sensitive, but it’s the tiny secret that balances sweetness and amplifies flavor. Sea salt flakes add a subtle crunch if sprinkled on the finished ice cream.
- Vanilla extract: Adds depth and richness—use pure extract for the best flavor. Artificial vanilla can be used in a pinch, but it’ll lack the nuanced aroma and complexity that real vanilla provides.
Homemade Vanilla Bean Ice Cream
Ingredients
Equipment
Method
- Slice the vanilla beans lengthwise and scrape out the tiny, oily seeds with a dull knife, collecting them in a bowl. The seeds will be fragrant and sticky, releasing a sweet floral aroma.
- In a saucepan, combine the cream, milk, and vanilla bean pods with seeds. Warm over medium heat until just simmering, releasing a fragrant aroma, then remove from heat and let steep for 15 minutes.
- While the cream steeps, whisk the egg yolks with sugar and a pinch of salt in a mixing bowl until smooth and slightly pale, about 2 minutes.
- Remove the vanilla pods from the warm cream and gradually pour a little of the hot cream into the egg mixture, whisking constantly to temper the yolks. Repeat this process until all the cream is incorporated.
- Pour the custard back into the saucepan and cook over low heat, stirring constantly with a spatula, until the mixture thickens slightly and coats the back of a spoon—about 5-7 minutes. Do not boil to prevent curdling.
- Strain the custard through a fine-mesh strainer into a clean bowl to remove any cooked egg bits and vanilla pod residues. Let it cool to room temperature, then cover and refrigerate for at least 4 hours or overnight for best flavor and texture.
- Once chilled, pour the custard into your ice cream maker and churn according to the manufacturer’s instructions. The mixture will thicken and develop a soft, creamy texture, with flecks of vanilla visible throughout.
- Transfer the churned ice cream to a freezer-safe container, smoothing the top with a spatula. Cover tightly and freeze for at least 4 hours, or until firm enough to scoop.
- Before serving, let the ice cream sit at room temperature for 5-10 minutes to soften slightly, making it easier to scoop and enhancing its velvety texture.
Notes
Common mistakes and how to fix them
- FORGOT to temper eggs: scramble or curdle—slowly reheat and whisk vigorously to fix.
- DUMPED in cold cream: caused clumps—warm the cream gently first, then add eggs slowly.
- OVER-TORCHED custard: curdles or thickens too much—stir constantly and remove from heat early.
- SKIPPED straining: lumps or shell pieces—strain the custard while warm for smoothness.
Make-Ahead and Storage Tips
- Prepare the custard base a day ahead; it needs to chill thoroughly for rich flavor and better texture.
- Freeze the churned ice cream for at least 4 hours, but overnight is ideal for scoopable firmness.
- Flavors can deepen overnight, so taste and adjust before serving if needed—vanilla may mellow slightly.
- Refrigerate leftovers tightly covered for up to a week; the texture may become slightly icier over time.
- For best re-softening, let the ice cream sit at room temperature for 5-10 minutes before scooping, until soft and creamy.
- Avoid leaving in the freezer too long—over 2 weeks can cause freezer burn and flavor dulling.
FAQs
1. How does real vanilla flavor compare to extract?
The vanilla aroma is rich and floral, with tiny black seeds that pop slightly between your teeth, giving a subtle crunch and a burst of vanilla flavor.
2. What should I feel when tasting fresh vanilla ice cream?
The ice cream feels velvety and smooth, with a slight creaminess that melts slowly on your tongue, leaving a lingering vanilla sweetness.
3. How do I know when the ice cream is ready to serve?
It’s best enjoyed immediately after churning when still soft and creamy, but it firms up into a dense, icy block after a few hours in the freezer.
4. What’s the best way to soften frozen ice cream?
Overfreezing makes it too hard and icy; let it sit at room temperature for 5-10 minutes to soften and regain creaminess.
5. Why did my custard curdle and how can I fix it?
If the custard curdles during cooking, gently reheat and whisk vigorously, then strain out any lumps for a smooth texture.

Hey there, I’m Devon Harper. I run a small neighborhood café by day, cook most of my meals far too late at night, and write Midnight Grocery Runs somewhere in between. If you’ve ever wondered whether something simple could turn into something comforting after a long day, you’ll feel right at home here.


