Mini quiche bites aren’t just adorable—they’re a surprisingly forgiving way to serve brunch or snacks. I love how versatile they are, letting you toss in whatever’s in the fridge, from leftover roasted veggies to stray bits of cheese. Plus, they’re a no-fuss way to impress without breaking a sweat.
Why These Mini Quiche Bites Keep Calling Me Back
They’re a blank canvas for flavor, endlessly adaptable, and always disappear fast. The joy of customizing each batch makes me feel like a kitchen artist. Plus, the small size means I can indulge without guilt—or overdoing it.
Ingredient Breakdown & Swaps for Mini Quiche Bites
- Eggs: Fresher eggs give a brighter, more stable custard—use organic if you can.
- Cream: Heavy cream makes it rich and velvety, but milk works in a pinch for a lighter bite.
- Pastry dough: Store-bought works fine, but homemade adds a buttery layer of love.
- Fillings: Think smoky, cheesy, or veggie-packed—whatever makes your heart sing.
- Herbs and spices: Fresh herbs brighten everything; a pinch of nutmeg adds subtle warmth.
- Salt and pepper: Season well—these bites need a good flavor foundation.
- Optional toppings: Cheese, bacon, or sautéed greens add texture and punch.
Tools & Equipment for Mini Quiche Bites
- Mini muffin tin: Creates perfectly sized bites that bake evenly.
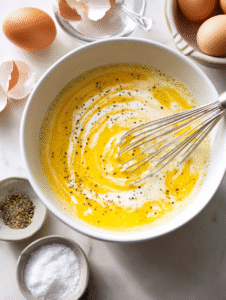
- Whisk: Blends eggs and liquids smoothly without lumps.
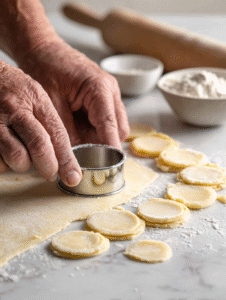
- Pastry cutter or glass: Cuts out pastry circles easily.
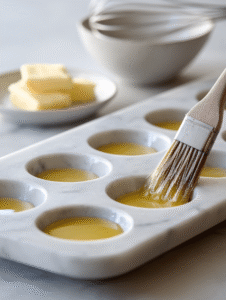
- Brush or spray: Greases the muffin tins for easy release.
- Cooling rack: Prevents sogginess by allowing air circulation.
Step-by-step Guide to Perfect Mini Quiche Bites
Step 1: Preheat your oven to 180°C (350°F).
Step 2: Grease a mini muffin tin with butter or non-stick spray.
Step 3: In a bowl, whisk together 3 eggs, ¼ cup cream, and a pinch of salt and pepper.
Step 4: Chop your chosen fillings—think smoky bacon bits, fresh herbs, or caramelized onions.
Step 5: Cut out small circles of pie dough or puff pastry to fit into each muffin cup.
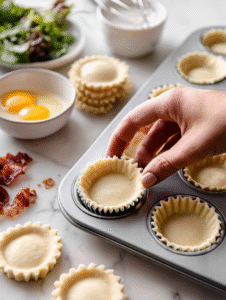
Step 6: Press the dough into the cups, making sure to cover the bottom and sides.
Step 7: In a separate bowl, combine your fillings with the egg mixture.
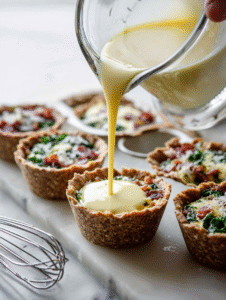
Step 8: Pour or spoon the filling into each pastry-lined cup, filling about ¾ full.
Step 9: Bake for 15-20 minutes, until the quiches are puffed, golden, and just set.
Step 10: Let them cool for 5 minutes before removing from the tin and serving.
Cooking Checkpoints & Tips for Mini Quiche Bites
- The crust should be golden and crisp, not soggy—bake longer if needed.
- Filling should be set but still slightly jiggly in the center when you remove from oven.
- Use fresh eggs and cream for the best flavor and texture.
Mistakes & Fixes in Mini Quiche Bites
- Filling remains runny after the time is up.? UNDERCOOKED FILLING? Bake a few minutes longer until set and slightly puffed.
- Pastry turns soft and limp.? CRUSTS GONE SOGGY? Blind bake for 5 minutes before adding filling.
- Burnt edges or tops.? OVER-TORCHED TOPS? Cover loosely with foil during last 5 minutes.
- Cracks or breaks in pastry.? Dough tears when fitting into muffin cups? Use a softer dough or chill before pressing.

Mini Quiche Bites
Ingredients
Equipment
Method
- Preheat your oven to 180°C (350°F) and grease a mini muffin tin with butter or non-stick spray.
- In a bowl, whisk together the eggs and heavy cream until smooth and slightly frothy, about 30 seconds. Season with salt and pepper.
- Chop your chosen fillings—think bits of cooked bacon, chopped herbs, or sautéed veggies—and set aside.

- Use a pastry cutter or glass to cut out small circles from the pastry dough, slightly larger than the muffin cups.
- Press each pastry circle into the muffin cups, covering the bottom and sides to create a shell.
- Evenly distribute your chopped fillings into each pastry shell.

- Pour the egg mixture over the fillings in each muffin cup, filling about ¾ full.
- Bake in the preheated oven for 15-20 minutes, until the quiches are puffed, golden, and just set in the center.

- Remove from the oven and let cool for 5 minutes on a cooling rack. The filling should be tender and slightly jiggly in the center.

- Gently lift the mini quiches from the tin using a small spoon or spatula, and transfer to a serving plate.

- Serve warm or at room temperature, garnished with extra herbs or cheese if desired.

Notes

Hey there, I’m Devon Harper. I run a small neighborhood café by day, cook most of my meals far too late at night, and write Midnight Grocery Runs somewhere in between. If you’ve ever wondered whether something simple could turn into something comforting after a long day, you’ll feel right at home here.


