Making raspberry crumble bars is more than just baking—it’s a quiet ritual I turn to when I need a break from the chaos. The process of measuring, mixing, and layering the ingredients feels almost meditative, turning simple tasks into a calming act. There’s something satisfying about watching the bright red raspberries peek through that golden crumble topping, like a little burst of summer in every bite.
This recipe became my refuge during busy weekends, a way to slow down and focus on the present moment. The scent of bubbling fruit and toasted oats fills the kitchen with a comforting warmth. It’s a reminder that the small, deliberate act of baking can ground me, turning everyday ingredients into a quiet celebration of patience and mindfulness.
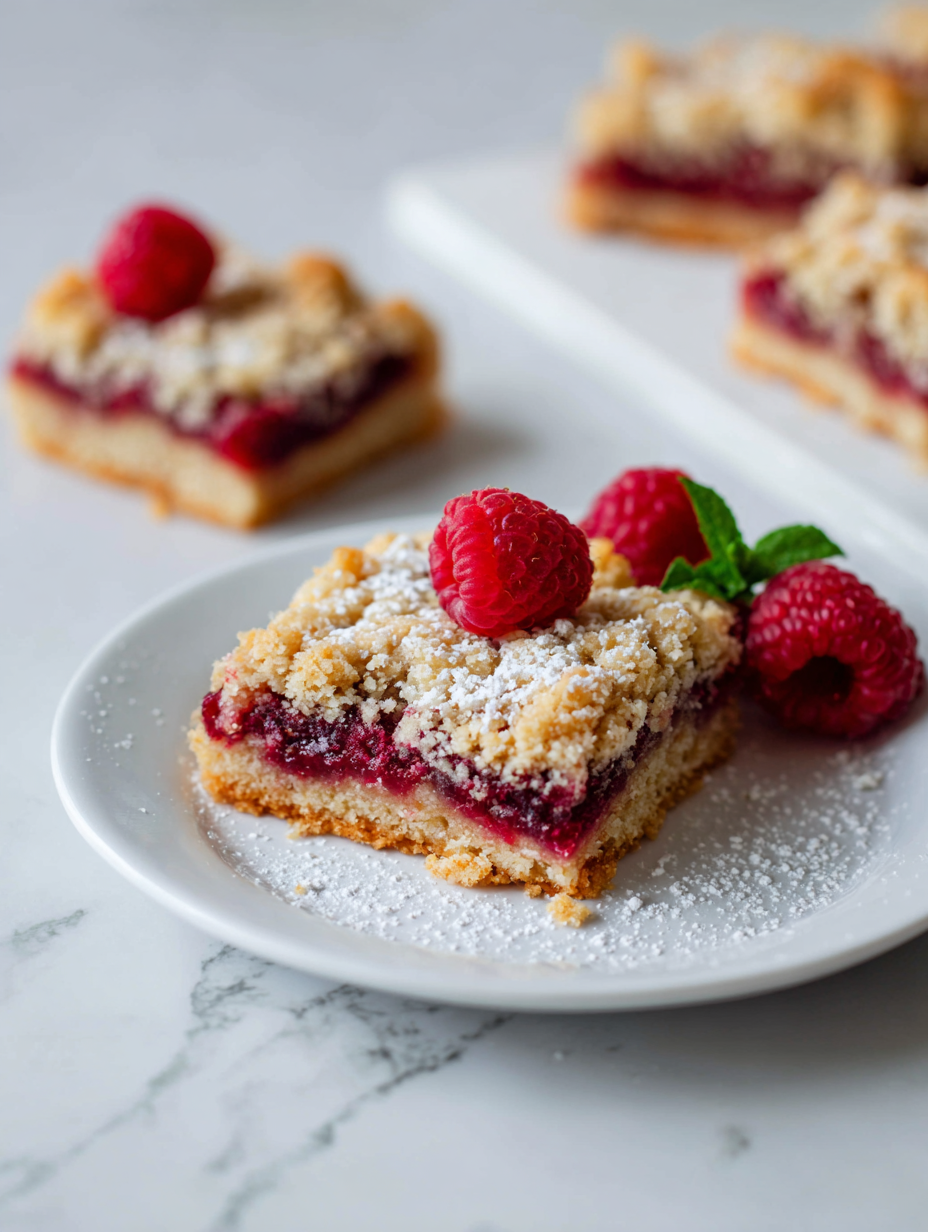
Focusing on how the process of making these bars can become a calming, almost meditative act in a busy kitchen, transforming simple ingredients into a moment of mindful baking.
The story behind this recipe
- This recipe was born out of a lazy Sunday craving for something bright and tart, but with the comforting crunch of a crumbly topping. I remember rummaging through the freezer, spotting a bag of raspberries I’d frozen at the height of summer’s bounty, and thinking, why not turn these into something special? The process of layering fruit and crumble feels almost like a small act of rebellion against the hurried pace of everyday life.
- I’ve always loved how raspberries burst with a puckery juice when baked, and I wanted a way to enjoy them that felt both indulgent and straightforward. Baking these bars became a ritual for me—something I turn to when I need a quiet moment, a little sweet reward that’s honest and unfussy. They remind me that sometimes, simple ingredients can make the most memorable treats.
- heading
- story_type
Ingredient breakdown: key components
- Fresh raspberries: I love the vibrant burst of tartness they bring. If yours are a bit dull, a splash of lemon juice can brighten them up before baking.
- Granulated sugar: It balances the berries’ acidity, but if you prefer a less sweet bar, cut back slightly or try honey for a richer depth.
- All-purpose flour: I use it for structure, but almond flour adds a nutty flavor and a bit more richness—swap if you want a gluten-free version.
- Cold butter: Essential for that crumbly topping. If melted, the topping becomes more biscuit-like—so keep it cold and cut it into cubes.
- Oats: They add chew and texture, and toasting them first enhances their nutty aroma. Skip or substitute with coconut flakes for a tropical twist.
- Lemon zest (optional): Brightens the fruit filling with a citrusy zing. If you don’t have fresh, a tiny pinch of lemon extract works well.
- Vanilla extract: A dash deepens the overall flavor, making the berries more fragrant. Feel free to omit if you want a more straightforward berry taste.
Spotlight on key ingredients
Raspberries:
- Fresh raspberries: I love the vibrant burst of tartness they bring. If yours are a bit dull, a splash of lemon juice can brighten them up before baking.
- Granulated sugar: It balances the berries’ acidity, but if you prefer a less sweet bar, cut back slightly or try honey for a richer depth.
- Lemon zest: Brightens the fruit filling with a citrusy zing. If you don’t have fresh, a tiny pinch of lemon extract works well.
Butter & Oats:
- Cold butter: Essential for that crumbly topping. If melted, the topping becomes more biscuit-like—so keep it cold and cut it into cubes.
- Oats: They add chew and texture, and toasting them first enhances their nutty aroma. Skip or substitute with coconut flakes for a tropical twist.
Notes for ingredient swaps
- Fresh raspberries: I love the vibrant burst of tartness they bring. If yours are a bit dull, a splash of lemon juice can brighten them up before baking.
- Granulated sugar: It balances the berries’ acidity, but if you prefer a less sweet bar, cut back slightly or try honey for a richer depth.
- All-purpose flour: I use it for structure, but almond flour adds a nutty flavor and a bit more richness—swap if you want a gluten-free version.
- Cold butter: Essential for that crumbly topping. If melted, the topping becomes more biscuit-like—so keep it cold and cut it into cubes.
- Oats: They add chew and texture, and toasting them first enhances their nutty aroma. Skip or substitute with coconut flakes for a tropical twist.
- Lemon zest (optional): Brightens the fruit filling with a citrusy zing. If you don’t have fresh, a tiny pinch of lemon extract works well.
- Vanilla extract: A dash deepens the overall flavor, making the berries more fragrant. Feel free to omit if you want a more straightforward berry taste.
Equipment & Tools
- Mixing bowls: To combine ingredients for topping and filling.
- Pastry cutter or fingers: To cut cold butter into dry ingredients for crumble.
- 9-inch square baking pan: To bake the bars evenly.
- Parchment paper or butter: To prevent sticking and make removal easier.
- Sharp knife: To cut clean slices after cooling.
Step-by-step guide to raspberry crumble bars
- Preheat your oven to 180°C (350°F). Grease a 9-inch square baking pan with butter or line it with parchment paper for easy removal.
- Mix the crumble topping: In a bowl, combine 1 cup all-purpose flour, 1/2 cup rolled oats, 1/2 cup packed light brown sugar, and a pinch of salt. Add 1/2 cup cold unsalted butter, cut into small cubes. Use your fingers or a pastry cutter to blend until coarse crumbs form. Chill in the fridge while you prepare the filling.
- Prepare the raspberry filling: In a separate bowl, toss 2 cups fresh or frozen raspberries with 2 tablespoons granulated sugar, a teaspoon of lemon zest, and a teaspoon of vanilla extract. If using frozen raspberries, let them thaw slightly so they release less excess moisture.
- Assemble the bars: Press about two-thirds of the crumble mixture evenly into the bottom of your prepared pan. Spread the raspberry filling over the crust, then sprinkle the remaining crumble evenly on top. Gently press down to set everything in place.
- Bake: Place in the oven and bake for 35-40 minutes, or until the topping turns golden brown and the filling is bubbling around the edges. The top should be crisp and fragrant, with a slight shimmer of toasted oats.
- Cool: Let the bars cool in the pan for at least 20 minutes. This helps them set and makes slicing easier. For clean cuts, use a sharp knife, wiping it clean between slices.
- Finish & serve: Once cooled, cut into squares. Serve slightly warm or at room temperature, perhaps with a dollop of whipped cream or a drizzle of honey if you like. The edges should be firm, with a gooey, bright raspberry center.
Let the bars cool completely in the pan for at least 20 minutes. Slice carefully with a sharp knife, wiping between cuts. Serve warm or at room temperature, as preferred.
How to Know It’s Done
- Topping is golden brown and crisp, not pale or soggy.
- Filling is bubbling at the edges with a glossy, oozy texture.
- Bars hold their shape when sliced, not crumbly or mushy.
Raspberry Crumble Bars
Ingredients
Equipment
Method
- Preheat your oven to 180°C (350°F). Line your baking pan with parchment paper or lightly butter it to prevent sticking.
- In a bowl, combine the flour, oats, brown sugar, and a pinch of salt. Add the cold butter cubes and use your fingers or a pastry cutter to work the butter into the dry ingredients until the mixture resembles coarse crumbs. Chill the crumble mixture in the fridge while preparing the filling.
- In a separate bowl, toss the raspberries with granulated sugar, lemon zest, and vanilla extract. Gently stir to coat and let sit for a few minutes to enhance the juices.
- Press about two-thirds of the crumble mixture evenly into the bottom of your prepared pan, creating a firm crust.
- Spread the raspberry filling evenly over the crust, ensuring the berries are distributed uniformly.
- Sprinkle the remaining crumble mixture over the top of the berries, gently pressing it down to help it adhere and form a topping.
- Bake in the preheated oven for 35-40 minutes, or until the topping turns a deep golden brown and the filling bubbles around the edges.
- Remove from the oven and let the bars cool in the pan for at least 20 minutes. This helps them set and makes slicing easier.
- Use a sharp knife to cut into squares, wiping the blade clean between slices for neat edges. Serve warm or at room temperature to enjoy the full burst of flavors and textures.
Pro tips for perfect raspberry crumble bars
- Crumble: Use cold butter and fingers or a pastry cutter for tender, flaky crumbs.
- Brighten Filling: Add a splash of lemon juice or zest to heighten raspberry tartness.
- Toast Oats: Briefly toast oats before mixing to deepen their nutty aroma and flavor.
- Layer Carefully: Press crust firmly but gently to avoid a dense, tough base.
- Watch Edges: Cover with foil if edges brown too quickly to prevent burning.
- Cool Completely: Let bars rest in the pan to set, making slicing cleaner and neater.
- Use Parchment: Line your pan with parchment for easy removal and minimal sticking.
Common mistakes and how to fix them
- FORGOT to chill butter: Warm butter makes topping greasy—keep it cold for crispness.
- DUMPED filling: Too much liquid causes soggy bars—add a splash of cornstarch to thicken.
- OVER-TORCHED edges: Watch carefully; cover with foil if browning too fast.
- MISSED a layer: Spread filling evenly; uneven layers cause inconsistent bites.
Quick fixes and pantry swaps
- When filling is too runny, splash in a teaspoon of cornstarch to thicken quickly.
- If topping turns soggy, sprinkle a bit more oats and bake a few extra minutes.
- Splash a little lemon juice when raspberries seem dull for a brighter flavor.
- Patch burnt edges with aluminum foil and shield the top if it browns too fast.
- DUMPED the crumble topping? Gently press it back into place before baking for even coverage.
Prep, store, and reheat tips
- Prepping the crumble topping and fruit filling ahead saves time and keeps your kitchen calm. Make the crumble a day in advance, store in an airtight container, and keep in the fridge for up to 2 days. The fruit can be prepared the night before, wrapped tightly, and refrigerated for 24 hours—just keep it covered to avoid fruit drying out.
- Store baked bars in an airtight container at room temperature for up to 2 days or refrigerate for up to 5 days. They develop a slightly firmer texture when chilled, which can be nice if you prefer a denser bite—just let them come to room temp before serving for optimal flavor and aroma.
- Reheating: Warm slices gently in the oven at 150°C (300°F) for about 10 minutes, until just heated through and the edges shimmer with a hint of crackle. For a quick fix, microwave on medium power for 15–20 seconds—watch for gooey filling to avoid overheating.
- Freezing: Wrap individual bars tightly in plastic wrap, then place in a freezer bag. They keep well for up to 3 months. Thaw at room temperature or briefly warm in the oven before serving. The flavors intensify slightly after freezing—think more concentrated berry punch.
Top questions about raspberry crumble bars
1. Can I use frozen raspberries?
Fresh raspberries give the brightest flavor, but frozen work well if thawed and drained well to prevent sogginess.
2. Can I make this gluten-free?
Yes, using gluten-free oats and flour can work, but the texture may be slightly different—expect a bit more chew and less crispness.
3. Why is my crumble topping greasy?
Chill the butter before cutting into the dry ingredients to ensure a crumbly, tender topping that bakes into golden bits.
4. How do I know when it’s done?
Bake until the topping is deep golden brown and the filling is bubbling around the edges, about 35-40 minutes at 180°C (350°F).
5. How should I store these bars?
Store leftovers in an airtight container at room temp for two days or in the fridge for up to five; reheat gently for best texture.
6. How do I cut clean slices?
Use a sharp knife to cut, wiping it clean between slices for neat edges. Let cool completely for the best results.
7. Can I add lemon to the filling?
Adding a splash of lemon juice or zest brightens the berries, enhancing their tartness and making the filling pop.
8. Why are my bars soggy?
To prevent sogginess, spread the filling evenly and press the crumble topping gently into place before baking.
9. Any tips for a better crumble topping?
Use cold butter and work quickly for a crumbly, tender topping. Toast oats beforehand for extra crunch and aroma.
10. Can I prepare these in advance?
Yes, these bars can be made a day ahead; store uncut in the fridge and rewarm slightly before serving for optimal freshness.
Baking these raspberry crumble bars is a small act of grounding in a hectic world. The smell of tart berries mingling with toasted oats always pulls me back to simpler moments, reminding me that comfort can be found in straightforward, honest baking. It’s a messy, imperfect process, but those are often the best memories in the making.
Sharing these bars with friends or family turns a simple treat into a little celebration of life’s quiet joys. No matter how busy or chaotic things get, I know I can always find a moment of calm in the process and a burst of bright flavor in every bite.

Hey there, I’m Devon Harper. I run a small neighborhood café by day, cook most of my meals far too late at night, and write Midnight Grocery Runs somewhere in between. If you’ve ever wondered whether something simple could turn into something comforting after a long day, you’ll feel right at home here.


