The beauty of roasting vegetables for Christmas is how it turns humble ingredients into something unexpectedly festive. It’s all about the caramelization, the smoky edges that seem to deepen the flavor with each passing minute. This method lets you make the most of seasonal produce, with minimal fuss but maximum impact. Plus, it’s a no-fail way to get everyone reaching for seconds.
Why I Keep Returning to This Roast
The simplicity of roasting transforms everyday vegetables into something special. It’s honest, forgiving, and endlessly adaptable. The way the smoky aroma fills the kitchen makes me nostalgic, reminding me of family dinners and quiet moments. Plus, it’s a blank canvas—perfect for tweaking with seasonal herbs or spicy finishing touches.
What’s in Your Roast? An Ingredient Breakdown
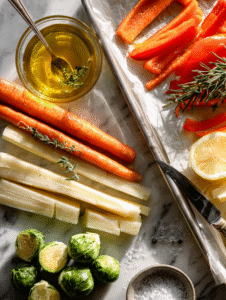
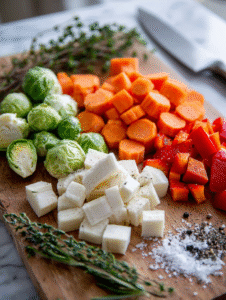
- Root vegetables (carrots, parsnips): Sweet, earthy, hold up well to roasting, adding structure and natural sweetness.
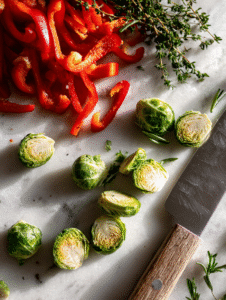
- Brussels sprouts: Bitterness mellows out with roasting, developing a smoky crunch.
- Red bell peppers: Juicy, smoky, brightens the plate with color and a hint of sweetness.
- Olive oil: Rich and fruity, it helps veggies caramelize beautifully.
- Fresh herbs (thyme, rosemary): Fragrant, they infuse the vegetables with a festive aroma.
- Lemon or balsamic vinegar: Adds a punch of acidity and brightness, balancing the earthiness.
- Sea salt and cracked pepper: Fundamental to enhance natural flavors and create contrast.
Tools That Make It Easy
- Baking sheet: To hold vegetables and allow even heat contact.
- Chef’s knife: For quick, uniform chopping.
- Mixing bowl: To toss veggies with oil and seasonings.
- Tongs: To turn veggies without breaking them.
- Oven thermometer (optional): Ensure accurate oven temperature.
Step-by-Step Guide to Perfectly Roasted Christmas Veggies
Step 1: Preheat your oven to 200°C (390°F).
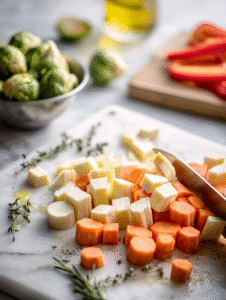
Step 2: Chop your chosen vegetables into uniform pieces for even roasting.
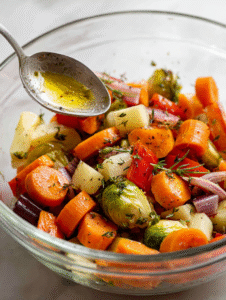
Step 3: Toss vegetables with olive oil, salt, pepper, and your favorite herbs.
Step 4: Spread them out on a baking sheet in a single layer.
Step 5: Roast for 25-30 minutes, flipping halfway, until edges are golden and slightly caramelized.
Step 6: Check for doneness: vegetables should be tender and browned.
Step 7: Remove from oven, sprinkle with a splash of lemon juice or balsamic vinegar.
Step 8: Let rest for 5 minutes before serving to allow flavors to mingle.
Cooking Checkpoints & Tips for Success
- Veggies should be tender when pierced with a fork.
- Edges should be crispy and caramelized, not burnt.
- The aroma should be warm, sweet, with hints of herbs and roast.
- Vegetables need space on the tray to roast evenly—crowding causes steaming.
Common Mistakes & How to Fix Them
- Overcrowding causes steaming, not roasting.? Use a crowded tray? Spread veggies out more for even roasting.
- Vegetables sticking and tearing.? Veggies stuck to the pan? Use parchment or a silicone mat.
- Burnt edges without cooked interiors.? Oven too hot? Turn it down slightly if veggies burn before tender.
- Flat flavor despite good roasting.? Didn’t season enough? Toss them again with salt and herbs after roasting.

Festive Roasted Vegetables
Ingredients
Equipment
Method
- Preheat your oven to 200°C (390°F) and line a large baking sheet with parchment paper for easy cleanup.
- Chop the root vegetables into uniform pieces about 1-inch thick for even roasting, and halve the Brussels sprouts. Slice the red peppers into strips.

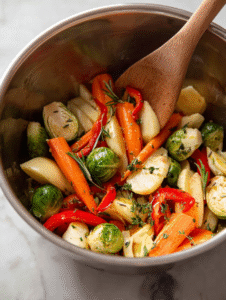
- In a mixing bowl, toss all the chopped vegetables with olive oil, chopped thyme and rosemary, a pinch of salt and pepper, and ensure they are evenly coated.
- Spread the vegetables out in a single layer on your prepared baking sheet, making sure they have space to breathe and caramelize properly.
- Place the tray in the oven and roast for about 25 to 30 minutes, flipping the vegetables halfway through, until the edges are golden brown and slightly caramelized.
- Remove the tray from the oven and drizzle the vegetables with lemon juice or balsamic vinegar for a bright, tangy finish. Toss gently to coat.
- Let the vegetables rest for about 5 minutes to allow flavors to meld, then serve warm, showcasing their tender centers and crispy edges.
Notes

Hey there, I’m Devon Harper. I run a small neighborhood café by day, cook most of my meals far too late at night, and write Midnight Grocery Runs somewhere in between. If you’ve ever wondered whether something simple could turn into something comforting after a long day, you’ll feel right at home here.


